首页
动态
文章
百科
花园
设置
简体中文
已关注
+
关注
花园里是空的哦~
还没有添加花。
动态 (6)
Martha
2017年05月22日
Martha
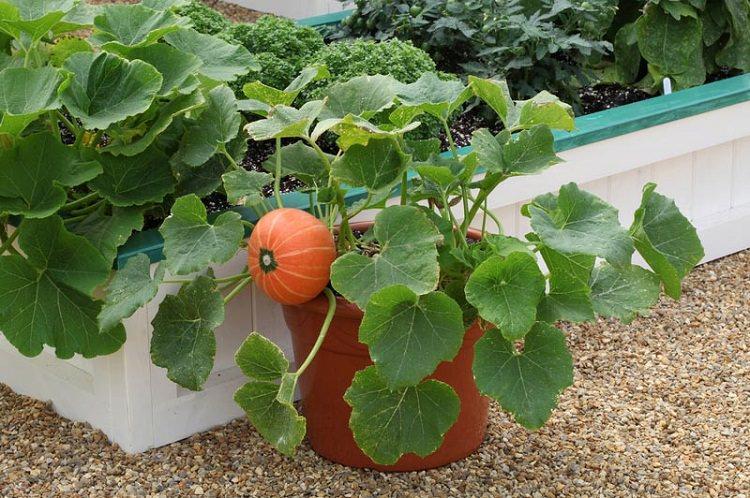
Learn how to grow pumpkins in pots, growing pumpkins in containers and pots is not difficult though it requires large containers and space. Check out!
Pumpkin is valued for its flavor and decorative appearance. Growing pumpkin in pots is not so difficult and does not require special care and in fact, it is a less demanding vegetable that adapts to any climate. Basically, an annual plant in the temperate zones, perennial in tropical ones. Must Read: Growing Cucumbers Planting You can grow pumpkins from seeds or else buy seedlings from a nursery. Best planting time for growing pumpkins is when the temperature exceeds above 65 F. In cooler climates it can be planted from April to late May. Whereas, in much warmer climates, it can be done until July. Moreover, if you live in a frost-free subtropical or tropical climate, you can grow it almost all the year. Choosing a pot Choose a large pot that is 10 gallons in size (for small pumpkin varieties), if you’re growing pumpkins in pots. For large cultivars, the bigger the pot the better, a 15-25-gallon pot that is 20-24 inches deep and wide is required. Also, ensure there is adequate drainage available to your pumpkin plants. Small Pumpkin Varieties Small pumpkin varieties like ‘Jack be little’, ‘Wee be little’, ‘Baby boo’, ‘Munchkin’, Pumpkin Hooligan’, ‘Mini-jack’, ‘Lil pump ke mon’ are most suitable for container gardening. However, you can also grow giant pumpkin varieties. Requirements for Growing Pumpkins in Pots
Position Place it in the sunniest location possible; remember that even the smallest pumpkin varieties need lots of sunlight to grow. Your plant should receive at least six hours of sunlight per day. The shadow will slow their growth and moisture will remain on the plant, thus resulting the mildew. Also, pumpkin needs a warm climate and plenty of room for growth. Still, you can even try growing dwarf pumpkins on a balcony or roof garden. Even if growing in a limited space, provide proper air circulation around the plant. Soil In cold climates, pumpkins grow best in a soil that heats up easily. Potting mix you use must be well-draining, have high humus content and slight water retaining capacity, too. Also, pumpkins require a lot of compost or manure, so additionally at the time of planting, you can add a lot of organic content. The ideal soil pH for growing pumpkins should be around 6 – 7.2. Watering Like all the gourds and melons, pumpkins require plenty of water and moist soil, so deep and regular watering is essential. Always, at the time of watering, avoid wetting the foliage. Must Read: How to Grow Watermelon in Pot Support You’ll need to install a strong and big trellis to support pumpkins vines. An A-shape trellis is good one. Make sure to keep the trellis away from the wall to avoid diseases. As the pumpkin vine begins to grow, train it to climb on the structure by carefully moving it through it. Pumpkin Plant Care
Mulching Do mulching, once your plants are grown a few inches tall. Mulching will reduce the amount of water evaporate and helps in retaining the soil moisture. Fertilizer Pumpkin plants are heavy feeders, they require a lot of fertilization. First of all, it’s important to have rich and fertile soil to get bigger and more meaty pumpkins. Best to use 10-10-10 balanced fertilizer in the early stage of growth. Later, the amount of nitrogen to be applied must be reduced. Switching to a low nitrogen fertilizer that is rich in potassium and phosphorus like 5-15-15 fertilizer in every other week (when the plant has grown and big enough to produce flowers) is a good idea. Pests and Diseases Pumpkin is a robust plant still it suffers from a few diseases, especially powdery mildew. In pests, you should keep eyes on common garden pests like aphids, flea beetles, and worms. Harvesting Pumpkins are ready for harvest within 90-120 days after planting (depending on the varieties and growing conditions). Green and unripe pumpkins are also picked to use in recipes and in many cuisines. But to pick matured pumpkins, see if it hardens and takes on a uniform and intense color (orange for most common varieties). Press the pumpkin with your thumb; If the bark is hard and it sounds hollow, it is the time to pick the fruit. The bark should also resist the nail pressure. Roughly speaking, one must count about 100 days between planting pumpkin and harvest at full maturity. To pick the pumpkin, remove it carefully from the branch using pruning shears or a sharp knife. Do not cut too close to the fruit, however; to extend the shelf life, leave a long stem (about 10 cm). Store your pumpkin in a dry, cool and dark area. A Few TipsIt is better if you’ll plant pumpkins directly in pots. If sowing seeds indoors, choose biodegradable pots, this way you’ll be able to transplant the seedlings without disturbing the roots.Male flowers start to bloom first, they attract pollinators and last one day. After that female flowers open, these have a small swelling at the base of the bloom.If there are no bees or other pollinators, to allow the plant to set fruits and to get the ample harvest, you may need to hand pollinate the male and female flowers.Don’t allow the plant to set too many fruits.As the fruits are heavy you’ll need to support them from netting or old stockings.
0
0
文章
Martha
2017年05月22日
Martha
In this article, learn how to grow pinto beans. The easy growing pinto beans are nutrient rich and eating them can reduce the cholesterol level and risk of heart disease.
USDA Zones— 5 – 11 Difficulty— Easy Other names — Phaseolus vulgaris var. pinto (Scientific Name)Frijol pinto, Speckled bean, Poroto frutilla, Strawberry bean, Carioca bean, Mottled bean, Phaseolus vulgaris and Common beans. Pinto beans are annual plants that grow best in areas with long hot summers as they take three to five months to mature for harvest. How to Grow Pinto BeansVarieties Pinto beans grow on both vine (pole) and bush. Pole bean varieties produce more yield than bush beans. But bushier varieties are relatively easy to grow. Propagation Sow seeds 1 inches deep in the soil when all the dangers of frost are passed. *Pinto beans require direct seed sowing as they are not easy to transplant. Also, remember that it is a subtropical plant and needs a temperature around 60 – 70 F (16 – 21 C) for germination. Space pinto bean seeds 3-4 inches apart in rows that are 2 to 3 feet apart. *Soak the seeds for 24 hours before planting to accelerate germination. Location Choose the sunniest spot in the garden that is less windy. For optimum growth, growing pinto beans in full sun is important. It needs at least six hours of direct sun a day but grows better if receive more sun. Also Read: How to Grow Cluster Beans Requirements for Growing Pinto BeansSoil Pinto Beans do best in well-drained soil that is loamy, avoid clay-rich, heavy or soggy soil. Soil that is waterlogging causes root rot. Watering Water the plant only when top one inch of surface seems dry. Avoid overwatering because it does not tolerate excessive moisture but handle a bit of drought. Also, try not to wet the foliage while watering as it may promote fungal diseases. Weeding Keep the location weed free by gently pulling out the weeds around the plants by hand. Better not to use a tool as pinto beans have shallow roots that can be damaged by weeding with the help of tools. Mulching Since pinto beans have shallow feeder roots, it is best to do mulching to stop weeds from growing. Mulching also protects the plants from the cold. Fertilizer For growing pinto beans you’ll require low nitrogen fertilizer, legumes produce their own nitrogen and applying too much nitrogen can also result in comparatively more vegetative growth than fruits. It needs fertilizer application twice for better yield. Admix 5-10-10 slow release fertilizer in the first 6 inches of the planting bed after the germination. Make sure not to apply fertilizer in 2 inches radius around the seedlings as it may damage them. Make a second application of 10-20-20 fertilizer when the plant begins to flowers. Pests and Diseases Its main problem is root rot, which you can easily prevent by moderate watering. Pinto beans are sometimes attacked by aphids, spider mites, whiteflies, leafhoppers, and beetles. Use organic sprays to get rid of them or handpick if the infection is small. You can also invite beneficial insects into your garden to get rid of them. Also Read: Plants that Attract Ladybugs Harvesting Pinto beans are ready for harvest within 90 to 120 days after planting. Harvest pinto beans by cutting the pods using clean scissors or pruning shear when they turn brown and become brittle and dry. You can also harvest the beans early if you want to use them green.
0
0
文章
Martha
2017年05月22日
Martha
Learn how to grow romanesco, growing romanesco broccoli is rewarding. It is a very decorative and ornamental cauliflower with exotic taste.
USDA Zones — 3 – 11 Propagation Method — Seeds Difficulty — Moderate Other Names — Brassica oleracea botrytis (latin name), Romanesco broccoli Romanesco Cauliflower, Romanesque cauliflower, Buzzy Broc Romanesco broccoli is also called “Broccoli Apple” and “Cauliflower with Turrets”. It is a Mediterranean plant, native to Italy, especially of Rome and is an Italian cousin of broccoli and cauliflower. It is a very decorative and ornamental cauliflower with exotic taste. You can even grow it in the flower garden and admire it. Romanesco is rich in vitamin C and minerals. It has a mild taste than other cauliflowers and slightly sweet flavor. Planting Seed sowing is done in spring and summer. If growing romanesco in cooler zones, sow the seeds 4 – 6 weeks prior to planting outside. Sow the seeds 2 cm deep. While planting the seedlings outside leave 50 cm (2 feet) of space in all directions. If growing in subtropical and tropical zones you can plant it in fall or in winter. Companion Plants Dill, artichokes, chard, beet, borage, chamomile, nasturtium, carrot, celery, cucumber, spinach, beans, hyssop, lettuce, mint, marigold, oregano, peas, potatoes, rosemary, sage, thyme. Incompatible Plants Garlic, chives, shallots, strawberries, turnip, onion, parsnip, leek, radish, rutabaga, tomatoes. Requirements for Growing RomanescoSoil Humus and compost rich soil that is well drained is recommended. Sun Growing romanesco in sunny spot for more yield. Watering Like most of the brassicas it enjoys frequent and regular watering. Romanesco Care Romanesco broccoli care is similar to other cauliflowers and cabbages. Fertilizer Mix compost and 10 – 10 – 10 slow release fertilizer at the time of planting. Fertilize it with high in nitrogen fertilizer one month after planting. Mulching Do mulching to keep the soil weed free and conserve moisture. Pests and Diseases Flea beetles, gall weevil, whiteflie, aphids and moths. Snails and slugs are fond of seedlings. Besides this it is infected by blight, clubroot and mildew. Harvesting Generally, romanesco is ready to harvest in 75 – 100 days after planting. Pick the head when they are tight and dense and use fresh as soon as possible. Crop rotation
0
0
文章
Martha
2017年05月22日
Martha
Growing Beets in Containers is easy. This quick growing vegetable doesn’t require much care and perfect for beginner container gardeners.
Beets are one of the fast growing vegetables and if you’ve grown other root vegetables like radishes or carrots, then growing beets in containers is not much different. Choosing a pot Use any type of container you find best with SUFFICIENT drainage holes. However, clay pots are an excellent choice. Growing beets is possible in small pots but ensure they are minimum 8 inches deep. 10 to 12 inches deep pots are IDEAL as they will encourage roots to develop! You can choose as much wide container as you want. The wider it would be the more plants you can grow together. Window boxes or large rectangular containers with the recommended depth are good choices. When to begin planting As a best practice, you can start planting beets in the spring, three-two weeks before the last (average) frost date in your area. You can continue to sow seeds every 3 to 4 weeks until when the temperature start to reach above 80 F (27 C). Again, you can begin planting in the late summer and early fall (autumn) when the temperature starts to come under the range of 85 F (29 C). For warm tropical climate As beets is a cool weather crop, those who live in warm subtropical or tropical areas (USDA Zones 9b-11) should grow it in late fall, winter and early spring. Planting Beets in Pots
First thing first– Beets don’t like to be transplanted, so no role of seed trays! Pick desired pots and sow seeds 1/4 inch deep. Once they germinate and reach the significant height, you can select the healthiest seedlings and thin others apart to maintain the recommended 3 inches distance spacing. To speed up the germination, you can also soak the seeds overnight in nonchlorinated water before planting. However, if seeds are treated with fungicide, avoid this. The seedlings will emerge anytime between 5 to 15 days, depending on the growing conditions. Until then keep the pots in a spot that is warm and receive mild sun and maintain the moisture in the soil. Once germinated, place the baby plants in the desired position and later when seedlings grow up to 3 inches tall, thin them. To maintain the spacing recommendation mentioned below. Varieties If you know how to grow beets in containers, you can try any variety. A few of them we’ve listed here are the Detroit Dark Red, Early Wonder, Sangria, and Sweetheart. Requirements for Growing Beets in Containers
Position Beets can be grown in full sun to part shade but for optimum growth choose a spot that receives full sun, at least 6 hours of sunlight is necessary. Also, make sure the spot you place your containers have good air circulation. Soil Soil that is loamy, penetrable and promotes the development of large roots is best for growing beet in a pot. Make sure your soil is rich in nutrients, you can also add a lot of compost. Also, avoid adding pebbles or stones in the soil or the bottom layer when growing this root vegetable. If you’re not using commercial soil packet for growing beets, prepare your own potting mix by adding 1 part soil, 1 part compost or well-rotted manure, and 1 part perlite. If you want to make a soilless mix, add 1 part peat moss or coco peat, 1 part compost or well-rotted manure, and 1 part perlite, vermiculite or sand. You can also add time-based fertilizer that is low in nitrogen at the time of mixing the soil.Watering If you don’t want hard and sinewy beetroots, water regularly and evenly. To keep the soil slightly moist all the time. Ensure you not let the soil dry out completely between the growing process and also avoid OVERWATERING. Spacing Maintain the 3 inches of distance between each plant from all direction for growing beets in pots successfully. You can grow each plant 2 inches apart, but this will hamper the growth of roots. For reference, the 12 inches wide rectangular pot can support around 4-5 plants. Temperature Keep in mind, the optimum temperature for growing beets in containers require a temperature around 50 F – 85 F (10 C – 29 C), but it can be grown in temperature as low as 40 F (4.5 C) and as high as 90 F (32 C) with difficulty. Beet Care
Fertilizer It’s a good idea to use time-based (slow release) fertilizer to add into the potting soil. As beets is a root vegetable and you may like to increase its root development, use a fertilizer that is low in nitrogen but high in phosphorous and potassium. For example, a formula of NPK 5-10-10. Once the beetroots growing in pots become one month and doing well, you can switch to a water-soluble fertilizer. With the same 5-10-10 formula. And if you see Nitrogen deficiency in soil, use the complete fertilizer with NPK in 20-20-20 ratio. If you want to grow beets organically, side dress plants with compost or manure and feed the plants with compost tea every other week. As beets usually suffer from boron deficiency, you can add seaweed (an excellent source of boron) fertilizer in compost tea for optimum growth.Pests and Diseases When growing beets in pots, you don’t have to worry about pests and diseases much. You can avoid most of the problems by not overwatering and avoiding overhead watering. The common culprits are root rot and scab. Leaf miners and common pests like aphids can affect the foliage growth. Harvesting Beets on average require anywhere from 6-8 weeks to get ready for harvest after germination. You can also harvest beet green to use in salads; the tender leaves taste delicious. You can start harvesting greens when leaves are a few inches long by cutting the outer leaves only and leaving the small inner foliage to grow, which you can harvest later.
0
0
文章
Martha
2017年02月17日
Martha
Learn how to grow #peanuts in this article. Growing Peanuts in containers is fun as well as easy to do and somewhat similar to #potatoes . Difficulty— Easy Other Names— Arachis hypogaea (Scientific Name), Groundnut Soil pH— 6 – 6.5 Peanut (Arachis hypogaea) is an annual plant belonging to the Fabaceae family, a legume. It is a hardy plant that requires minimal attention. Peanut, which is also called groundnut contains many trace elements like copper, zinc, manganese and vitamin B and is very nutritious. How to Grow Peanuts in ContainersPropagation and Planting Peanuts in containers Fill the seed tray or container with potting soil or potting mix. Sow seeds at the depth of 3 cm. Cover them up with a thin layer of soil. Also note that peanut seeds you obtain for sowing must remain in their shell and you should open them just before planting. For proper germination and maximum yield, temperature must be above 70 F (21 ° C), 80 F is optimum. After a week or two, the seeds will germinate. Let the seedlings grow a bit and replant them in individual pots.
If you’re growing peanuts in cooler zone you should remember that peanuts require at least 100 frost free days to mature. You’ll need to start the seeds indoors, earlier, at least 30 days before the final frost date in the spring. Choosing Containers Peanut develops its pod from 5 to 10 cm under the ground. So select pot at least 30 cm deep and 40 – 50 cm. wide (1 feet deep and 1 – 2 feet wide). Make sure the pots have sufficient drainage holes. You can grow 2 – 3 plants in such a pot. Requirements for Growing Peanuts in ContainersPosition Peanut is a tropical plant, it loves to grow in slightly humid and warm conditions. When growing peanuts in containers place them in the sunniest but less windy spot of your balcony or terrace. The plant does not survive below 32 F (0 ° C). It flowers and fruits at a temperature between 70 – 95 F (20 to 35 ° C). Soil For growing peanuts in containers fertile and light soil is required, which is neutral in pH and well-drained. Best to buy a good quality organic potting mix or make your own. Watering When growing peanuts in pots, keep the soil slightly moist. During early growth and flowering period, increase watering. However, the plant tolerates short dry periods.
Peanut Plant CareEarthing up The base of the peanut plant should be covered with soil to increase production. Once the plant reaches 10 inches of height earthen up the soil around the base, as is the case of potatoes, so as to favor the development of the pods. Fertilizer Initially it will not need any type of fertilization, but when you see the first yellow flowers forming, it is then useful to help the plant with the organic fertilizer that is rich in phosphorus and potassium as peanuts are legumes and form their own nitrogen you don’t need to fertilize them with additional nitrogen fertilizer. Pests and Diseases The most common diseases in addition to molds and fungi are leaf spots. In pests it is attacked by aphids, potato leafhopper and spider mites. Harvesting PeanutsWhen and How to Harvest Peanuts?
1
0
文章
Martha
2016年06月20日
Martha
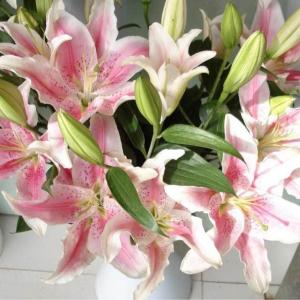
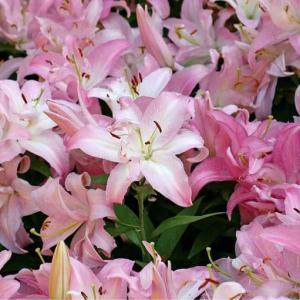
#Lilies are beautiful fragrant herbs with showy funnel shaped or bell shaped flowers.
 #Lilies   are beautiful fragrant herbs with showy funnel shaped or bell shaped flowers.
 #Lilies   are beautiful fragrant herbs with showy funnel shaped or bell shaped flowers.
0
0
动态
举报 反馈

您有什么意见或建议,欢迎给我们留言。

请输入内容
设置
VIP
退出登录
分享

分享好文,绿手指(GFinger)养花助手见证你的成长。

请前往电脑端操作

请前往电脑端操作

转发
插入话题
提醒好友
发布
/
提交成功 提交失败 最大图片质量 成功 警告 啊哦! 出了点小问题 转发成功 举报 转发 显示更多 _zh 文章 求助 动态 刚刚 回复 邀你一起尬聊! 表情 添加图片 评论 仅支持 .JPG .JPEG .PNG .GIF 图片尺寸不得小于300*300px 最少上传一张图片 请输入内容