首页
动态
文章
百科
花园
设置
简体中文
已关注
+
关注
花园里是空的哦~
还没有添加花。
动态 (40)
Gina
2017年05月31日
Gina
Fall is one of the best times to up your curb appeal and create a welcoming yard and garden for all your family and friends. Updating your planters and containers for fall is easy, can be done in an afternoon, and can last well into the holiday season. Fall creates a whole new gardening personality… one that is more laid back and sleepy, but also electrified with color and texture. It’s almost as if Mother Nature wants one last dip in the pool before the summer sun sets for the cold winter. And she brings the margarita mix. Gotta love that.
3 Steps to Easy Fall Containers Step One: Add foliage. When your existing containers get tired, nothing perks them up like a fresh foliage plant. Adding a foliage plant to help the eye “rest” is key in this season where everything can look busy. Foliage will also carry farther into the colder weather, extending your containers’ season. Our favs? Ornamental Kale is always a winner, but so are various types of ivy, lamium, and dusty miller. If you grow lambs ear (or any other foliage perennial for that matter) in the garden, now is a great time to divide it and plant some divisions in your pots. Hardy herbs can also be a great idea at this time of year. You may have some plants from the earlier season that can stay in place and contribute here too… don’t be too quick to boot out a plant just because it isn’t flowering.
Step Two: Add filler flowers. This is where you add the sparkle! Pop in some festive fall annuals here, mums, pansies, asters, zinnias… You don’t need a bunch here, just choose one or two you love! And don’t skimp. Your plants won’t have much growing time to fill in, so tuck them pretty close together to give them a designer look. This time of year, you can either choose to stay with one or two colors for a calmer color scheme, or go all out and make it a fall fiesta. Step Three: Add texture. Ornamental grasses are a great bargain this time of year, and are usually on clearance. Pick up a few container size varieties to add texture, height and structure to your fall container garden. Make sure you plant the taller grasses in the back of the container.
Tips: You will need to clean out the old summer annuals from your old containers. Pull out a few new containers if the budget allows. This is a great time of year for re purposed containers as well… a planted wheelbarrow or old tins buckets just hints at the hard work that went into the garden harvest!
When cleaning out the the old plants, don’t be shy about getting those packed in roots out of there. Use a sharp knife if necessary. Add additional fresh soil when you place the new plants into the containers, and pack lightly. Water. What’s your opinion? Can’t wait to decorate the yard for fall, and usher in those holiday festivities with style? Or do you think its a waste of time… those flowers are just going to die anyway? (We’re hoping you pick the first one!)
1
1
文章
Gina
2017年05月27日
Gina

I love herbs, and growing them indoors is easy. Herbs add a texture, feel and scent to a room or a garden that is unlike any other plant. And, there is nothing like cooking with fresh herbs! But if you are like me, you like to do most things just a little bit different, so we found these DIY indoor herb garden projects and ideas that are just a cut above the usual terra cotta pots. (Not that there is anything wrong with that!) And in case you need a little guidance as well, some advice for which herbs grow well and how to maintain your herb garden indoors. Our featured photo above, is by Intimate Weddings. They have a step by step on creating this teacup herb garden. Indoor Herb Garden Basics Herbs generally require full sun, so you need to choose the placement of your herb garden well. A south facing window is ideal. As much bright light as possible is a key to success growing herbs inside, away from their natural environment. Choose the right kind of herbs. Some herbs, such as basil, can be really tough to grow indoors because they really do need 6-8 hours of full sun each day, which is impossible to achieve in a window. Our favorite herbs to grow indoors include parsley, lemon balm, mint, chives and some varieties of thyme and oregano. The broader the leaf the better they do indoors. Lemon Thyme, or Doone Valley Thyme are favorites. In general, if an herb does well in partial shade outdoors, it will do well in a sunny indoor exposure. Herbs need good drainage. Make sure you provide well draining soil and pots, and consider using gravel in the bottom for extra drainage. Adding a little grit or sand to the potting mix is great too. If you are using a container that tends to hold moisture, such as glass, use some activated charcoal in the bottom as well. (Sold in the houseplant section.) Don’t overwater. Wait until the top inch of the soil is dry before watering most indoor plants. Overwatering is the number one killer. Fertilize weekly with a weak liquid fertilizer for good growth, and remember to cut your herbs and use them! Cutting them back encourages new growth. Now that you have the basics for growing herbs indoors down, here are some amazing projects we found to create one of a kind herb gardens. This idea is an easy one…we suggest inserting small pots and liners into the drawers first if the piece you are using has any value…
  This project is simply old tuna cans (painted if desired), with stained wood clothespins clipped onto the edges of the can. You can get these old style clothespins at the dollar store. See how they did this lovely project over at ‘7th House on the Left’.
  Old tin cans and chalkboard paint, plus a little chain from the home improvement store…
  Speaking of chalkboard paint, Breakfast with Audrey has this great tutorial on creating chalkboard herb garden pots. I love this, because you can reuse them each year for new herbs or plants, and the chalkboard gives it a vintage quality…
  Another teacup herb garden by BHG, that has a more contemporary feel, but still homey…
  A great way to re-use this kitchen canister!
  Sweet Paul Magazine has this great idea…Hang pegboard with s-hooks, and plant herbs in just a few of your coffee mugs! This is THE place to use charcoal and gravel in the bottom since they have no natural drainage, but talk about personality for the kitchen!
  Paul Vitale, who designed the above project for Sweet Paul Magazine, also did this tin can herb garden. He simply attached cans to a piece of wood, then planted them.
  From Funky Junk Interiors, this old kettle herb garden is a great repuposed project!
Finally, Apartment Therapy brings us this inspiration tea tin herb garden!
1
0
文章
Gina
2017年05月25日
Gina

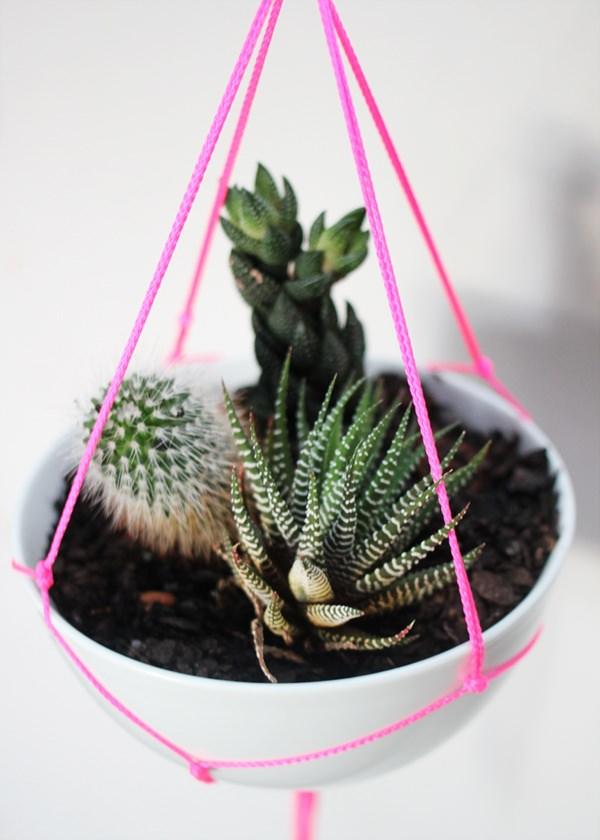
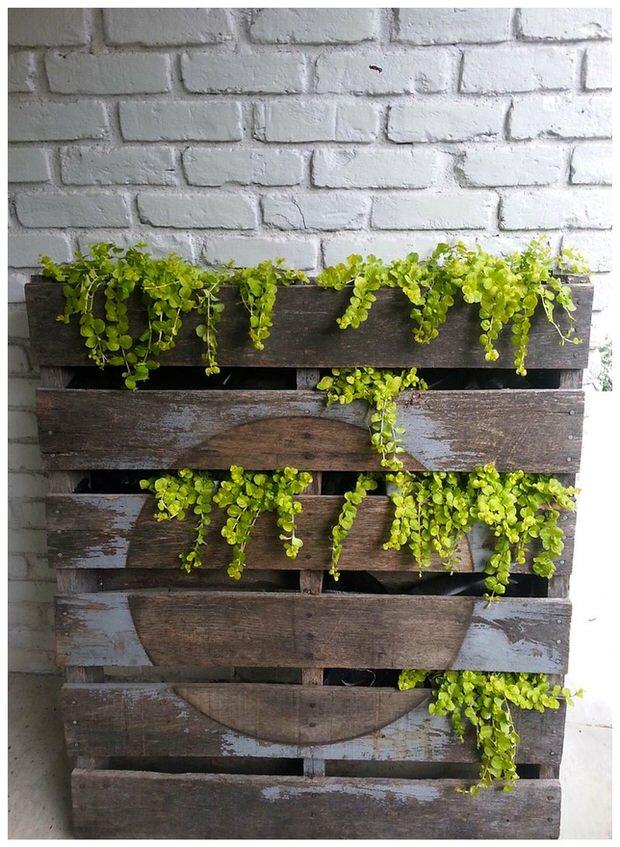
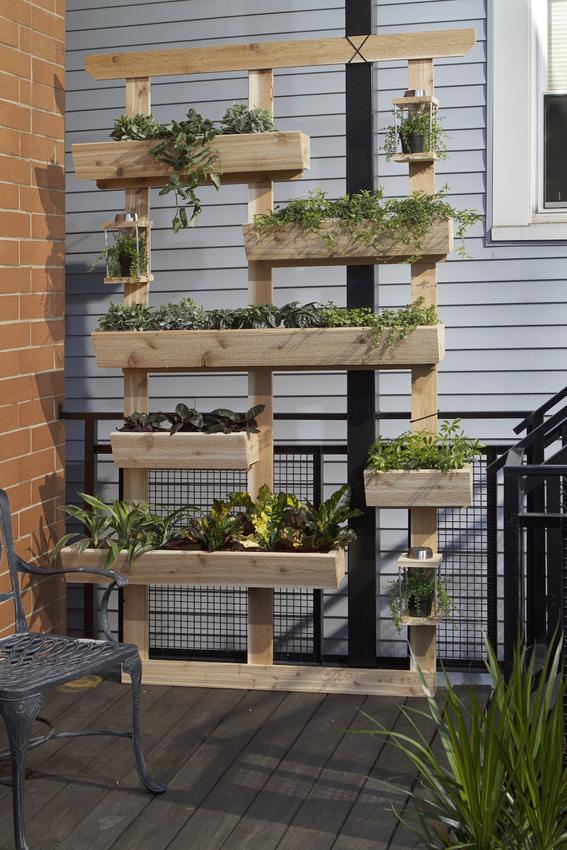
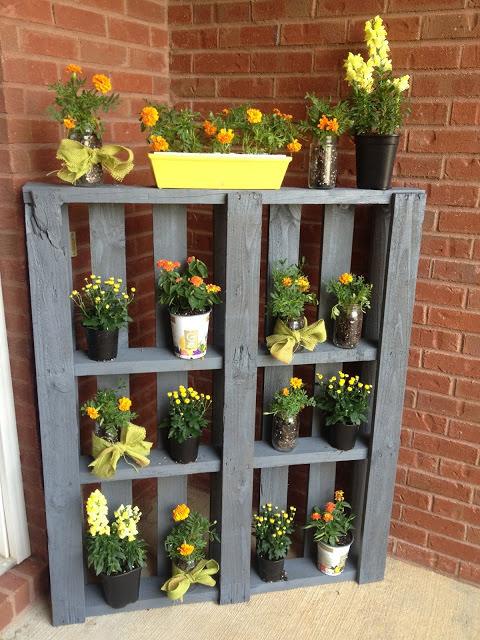
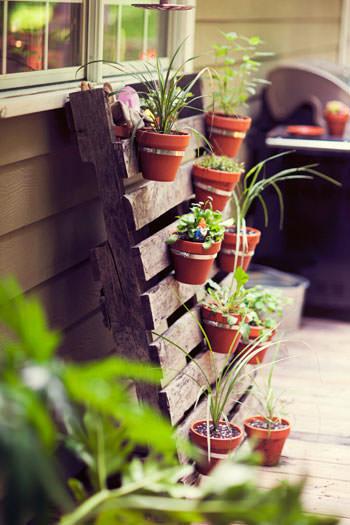
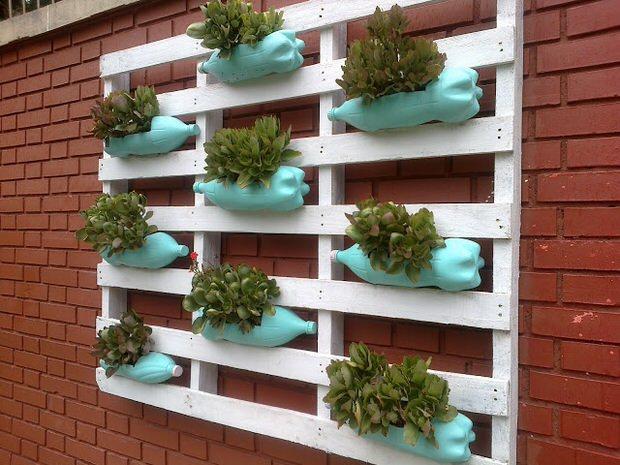
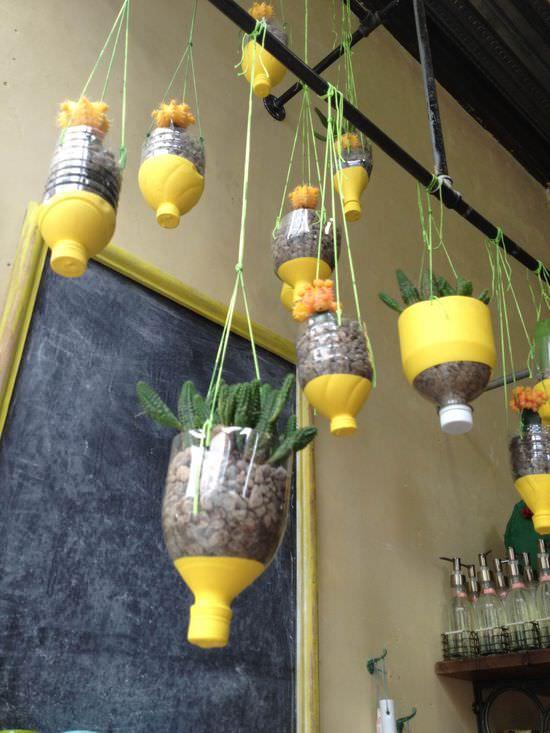
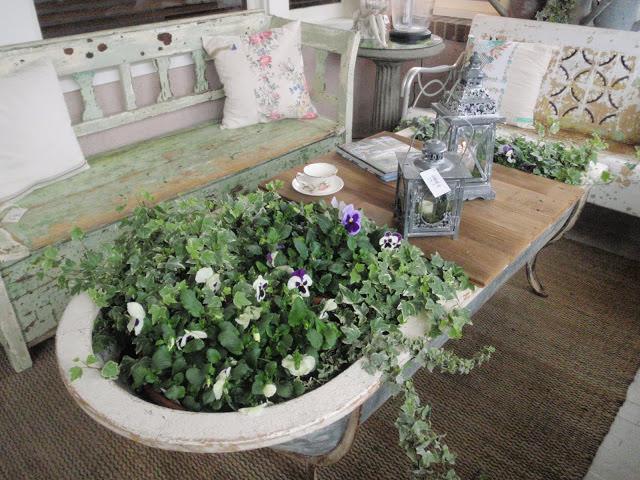
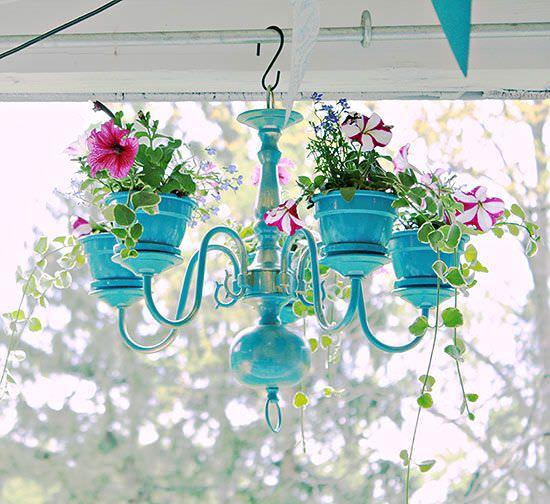
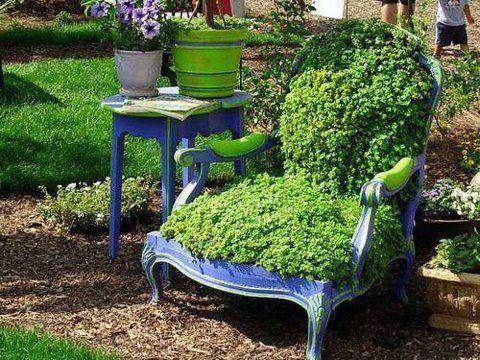
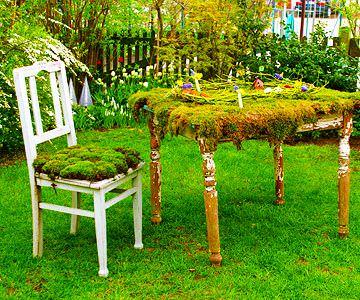
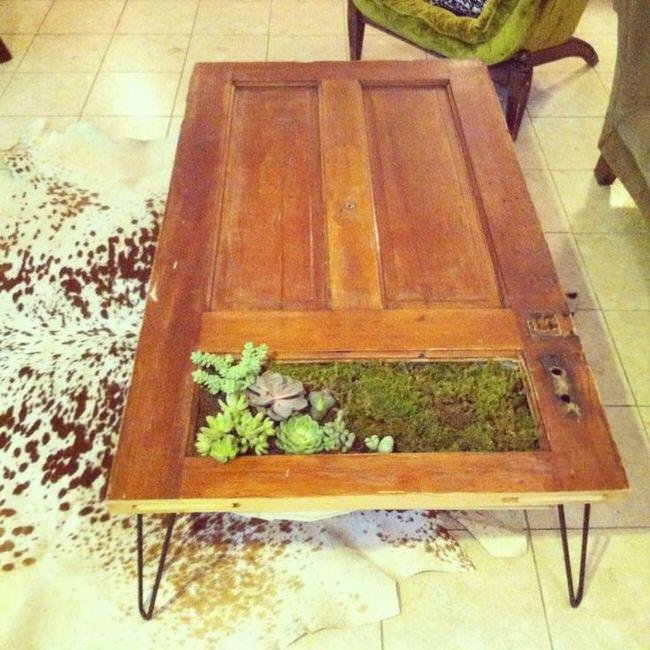
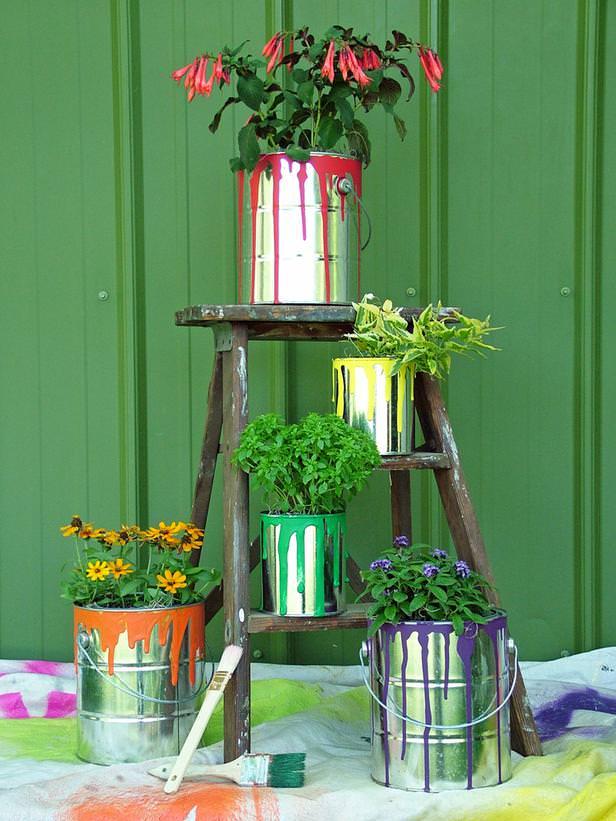
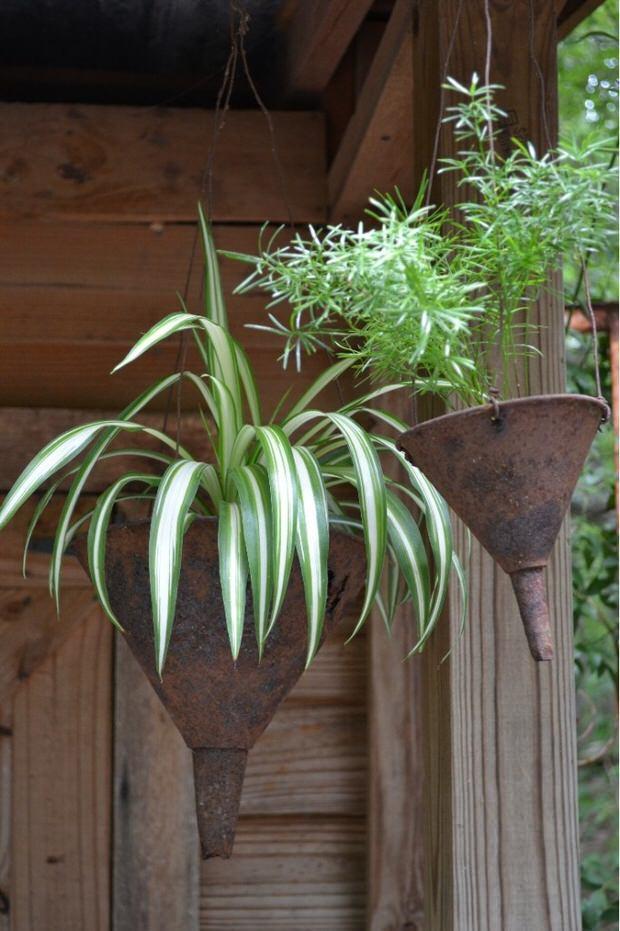
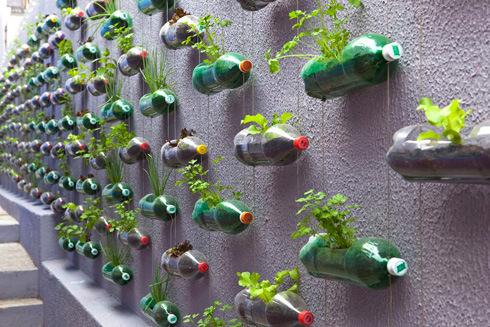
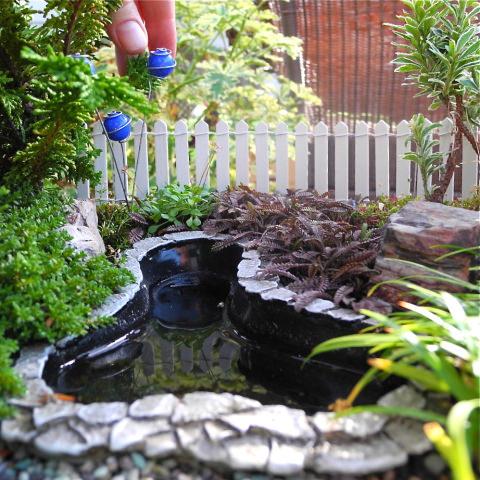
#Hanging planters work both indoors and out, with garden annuals and with evergreens. Creating your own DIY hanging planters is easy, and it adds character to your home or garden by giving you a unique container. Keep in mind that hanging planters can be heavy, so please use your judgement in choosing hanging materials, and in securing them to a structure. Other than that, anything that holds soil and is light enough to hang is fair game! Here are some DIY tutorials, inspirational photos and ideas to get you started. You can find the instructions for our featured project, above, at Drifter and the Gypsy. This re-cycled hanging container idea is an easy one to figure out… glue pop container lids on, dip into paint and let dry, then punch holes (I bet a hole punch would work!) and hang with twine.
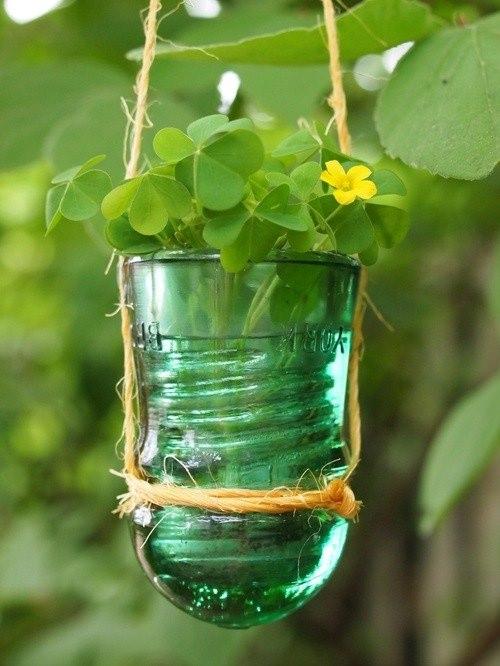
  If you loved our post on garden lighting using insulators, you’re going to love this hanging planter. Pretty simple!
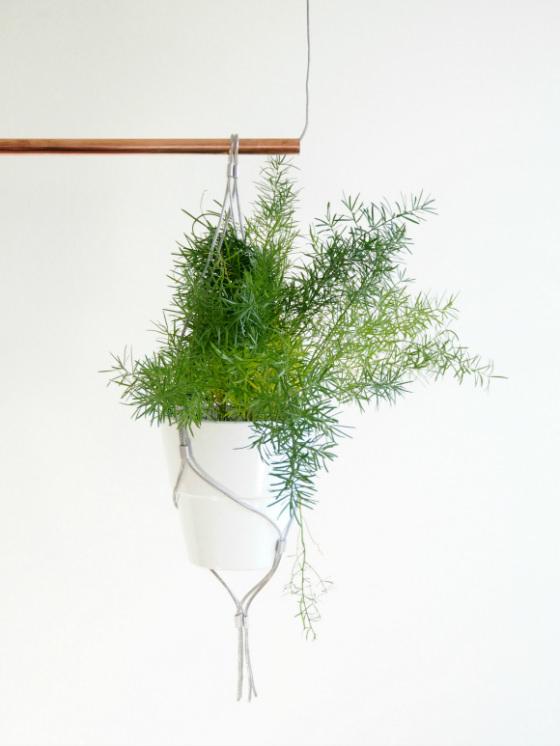
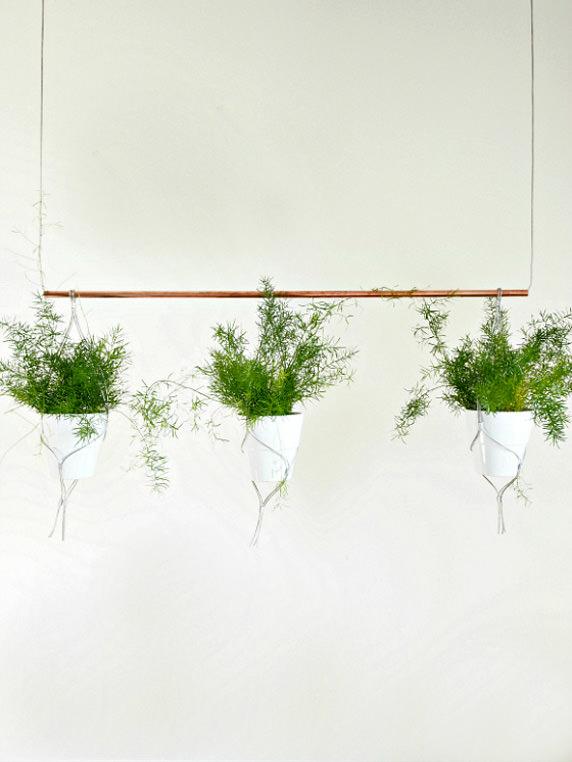
  Eclectic Trends offers us this great tutorial on making this contemporary hanging planter with copper pipe and wire. Love the creativity!

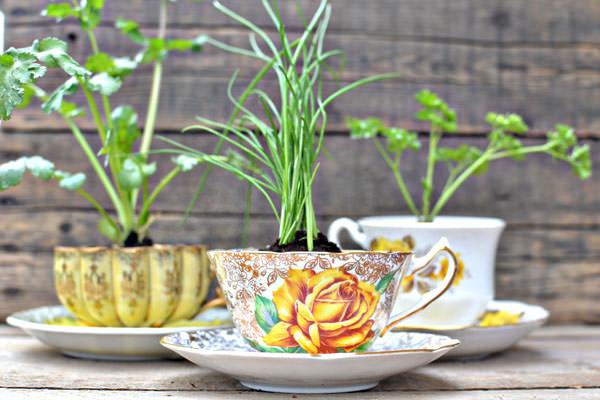
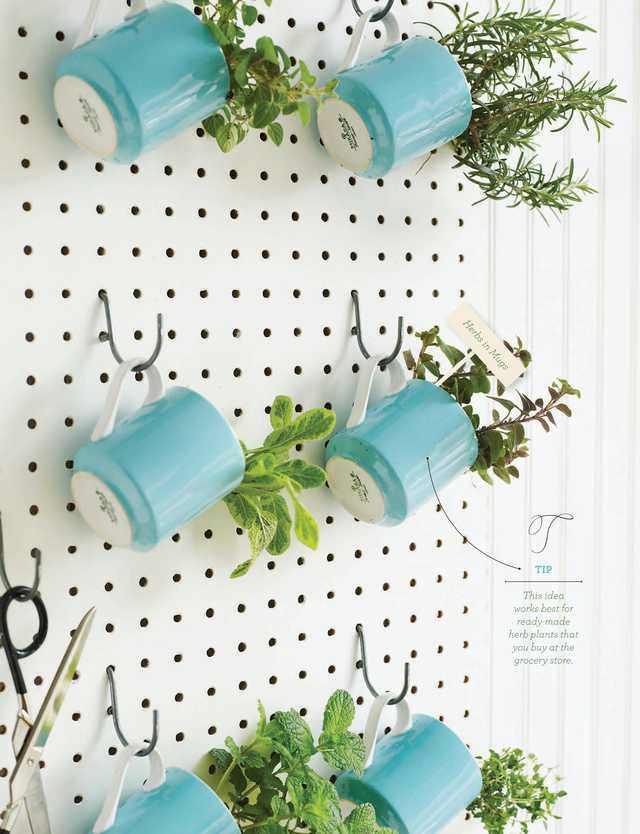
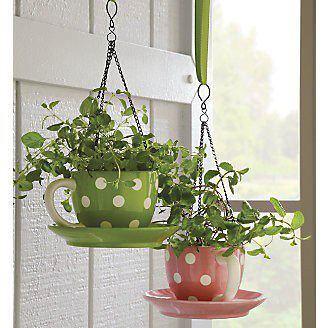
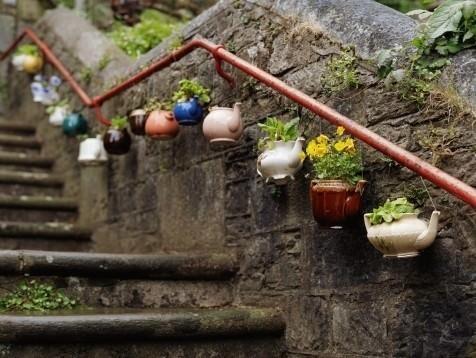
  For the “cute” in all of us… these polka dot teacups were converted by gluing the saucers to the cups with industrial strength glue (we recommend Gorilla Glue) and using a ceramic tile bit and an drill to create holes for hanging.
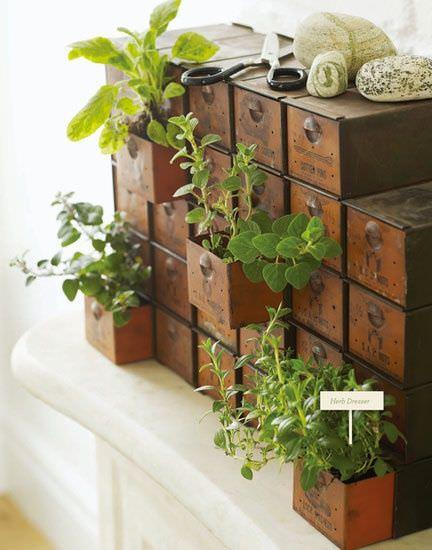
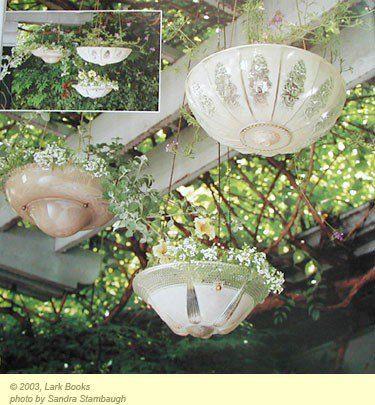
  Old light fixtures and that same tile bit and drill create these great planters by Lark Books.
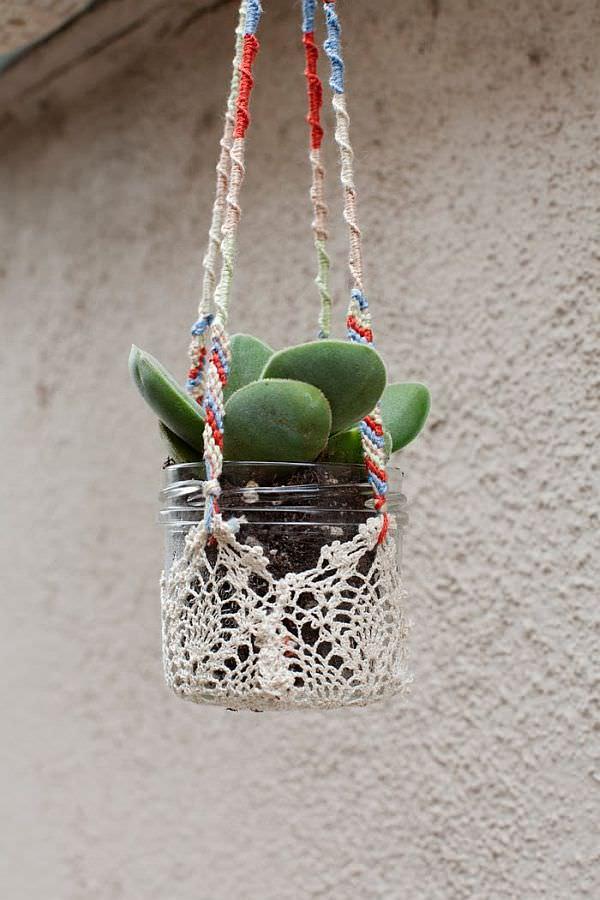
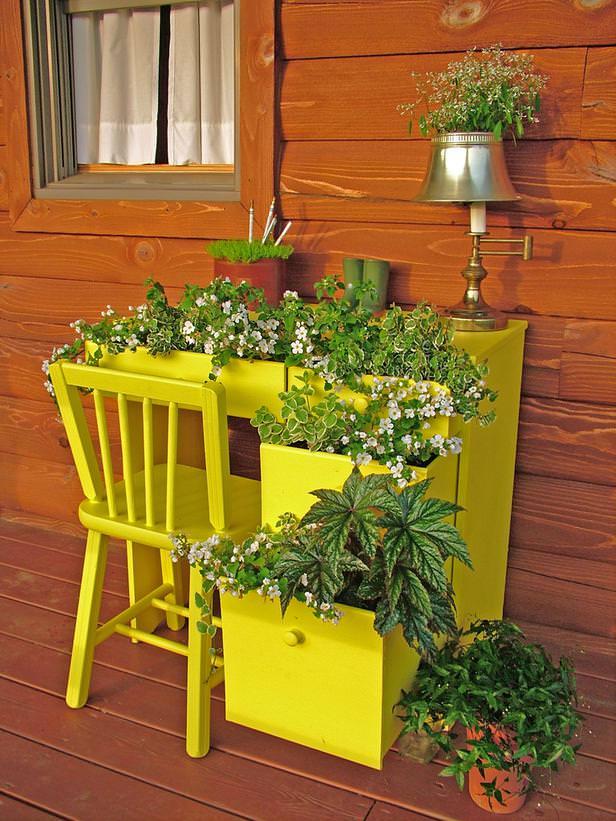
  This project both recycles, which makes is cool modern, and uses a touch of the past. Love it’s originality. Find the DIY instructions here.
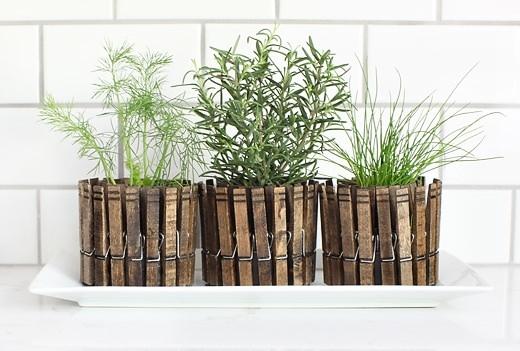
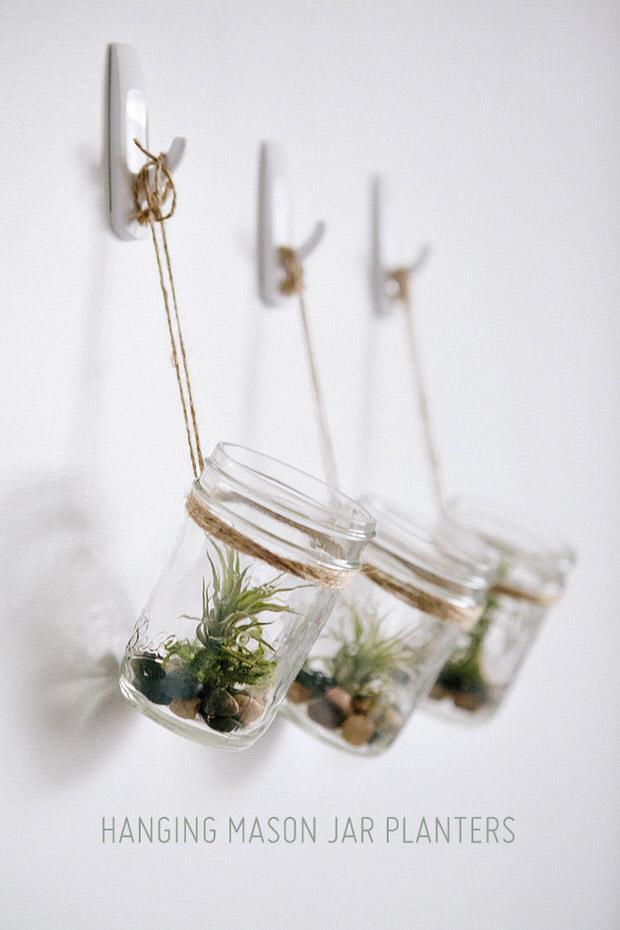
  One of my favorites in this post is the DIY mason jar planters! Oh So Very Pretty has the complete instructions. See more mason jar ideas from us here.
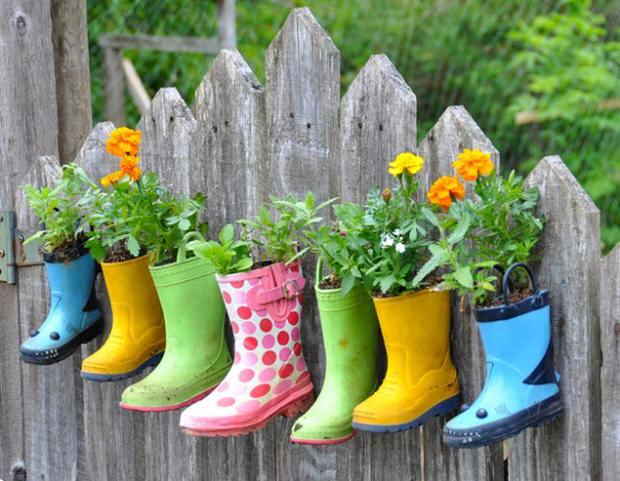
  So create some hanging planters for your garden! Don’t feel like you have to limit them to the front porch though. Hang them in trees, off brackets on fence posts, or from the top of arbors and decks. Let us know, which one is your favorite?
0
0
文章
Gina
2017年05月23日
Gina

Plant your furniture…literally! We have run across these really neat ways to integrate plantings into your garden rooms, by planting your furniture itself! Really unique containers, and I love the idea of having plants as part of the outdoor room, not just next to it. Some of these have some easy DIY instructions, and others are just inspirational to get your creative ideas flowing… but they are all great ideas for any garden seating area. Remember, you can always alter a tutorial to fit your style and needs… love the chair planter, but it’s too cottage for you? Plant a simpler chair with succulents, or all foliage plants for a more minimalistic look. Use moss, or succulents, or try using all one type of flower in a project instead of a mix. I actually love the simple green of the modern table with the grass… the deep green color also brings out the amazing wood the table is made of… Remember, if you decide to go it alone, and dive into creating a planter out of furniture, you must either accept that the weathering of the water and plants will eventually rot away the piece, or you must provide a moisture barrier to protect the furniture. This can be as simple as attaching some plastic sheeting with a staple gun. Remember, the thrift store and yard sales are your friend here. So here are our picks for planting your furniture, send us pics and share your projects readers! Our featured project, above, from HomeJelly is one of my favorites, and simple enough for anyone… Its a ceiling beam planter bench, and has a complete tutorial. All you need for this is a drill, a chisel, and wheels if you want it to be movable…You could also do this with railroad ties, but I would worry about seeping creosote myself… Don’t forget to read their safety advice!  Want a similar, upscale look? Tao Concrete on Etsy sells this version. We could see this being DIY’able as well.
  From HGTV, this dresser planter is an easy one…just remember to line the drawers before you fill with soil if you want to preserve the wood. You could use the top as a serving buffet!
  FromKatie Jackson Woodworks on Instructables, this Reclaimed Wood Flat Pack Picnic Table With Planter is pretty cool… you can use the center trough for ice and drinks, or plant herbs, pretty lettuce or edible flowers. This design is an award winner as well!
  From This Old House, this hypertufa planter table is clearly amazing… and the hypertufa is so much lighter and stronger than concrete. Great instructions for this project, and even a video.
  Since we are on hypertufa, Lowes has this step by step for this hypertufa planter table as well, and this might be a better beginner project. So cute!
  Cactus Jungle took the hypertufa table idea, created two troughs and used succulents. Cool!
  From Libby James, and totally inspirational, this is the modern table I talked about in my intro… This. Is. Cool.
  From Four Generations, One Roof, we love this DIY chair planter. Color, not too cute but fun and fresh! Don’t forget to check out her complete tutorial.
  This tin bathtub planter table is great inspiration… This photo is by Hammers and High Heels from Bachmans in Minneapolis… This would be an easy DIY folks!
  Who needs lighting? This DIY chandelier planter by DIY Show Off will make your outdoor room glow all by itself! Follow her step by step instructions to find our how to take your thrift store (or basement) find and turn it into garden treasure. (BTW, this project was featured by BHG!)
  Purely inspirational, we found this photo on Pinterest, and I would love to have this whimsical piece in a corner of my garden! I would think you could DIY this with some chicken wire, a staple gun and some patience. If anyone knows who created this marvelous piece, please let us know, we’d like to pick their brain!
  The blog that originally posted this idea no longer exists, but I had to include it… Again, staple gun, some soil, and some moss is all it would take. Remember if you use moss that it requires shade and water… There are some sedums now that have find texture that would give you the same look for sunnier and drier gardens. Sedum “Acre” would be great choice, and has tiny yellow flowers in summer.
  An engineering gardener created this planter table form an old door, and some hairpin table legs. Amazing ingenuity!
  A lot of mid-century furniture was designed with planters, it was part of the theory behind the modern movement to integrate nature in design. Keep your eye out for pieces like this at yard and estate sales, and don’t be afraid to press them into use outdoors in a covered or protected area.
  And this one from ModAttic…
  Lastly, this DIY coffee table with built in planter from Shelterness… Good instructions, easy project…
0
0
文章
Gina
2017年05月23日
Gina

If your vision of growing cactus involves a dry desert look, think again. Cactus and succulents are one of the hottest garden trends going on right now, and we all should give them a little look. Live in a northern climate and don’t think you can grow them? We cover that too. Here’s how to grow cactus, and some great inspiration in using them as a modern design element to update any garden or landscaping . Basics Needs of Cactus First of all, when most of us think of cactus, we think of the varieties meant for desert environments. While there are many beautiful ones that grow down south, most people don’t know that there are several hardy varieties as well. Check with your local nursery, then check out our guidelines for growing in northern gardens. So number one is that they need to be well matched with their planting zone. Second, all cacti need well drained soil. Grow them in a mix of 50 percent soil to 50 percent coarse sand. If growing in containers, use a commercially available cacti mix. They need very little water. If you live in an area that gets rain in the summer, than that is probably all they need. If they grow in containers, let them dry out completely before watering. They need little fertilizer. For blooming varieties, you may wish to give them a diluted drink of liquid fertilizer just as they start setting buds. They need full sun. Duh. Growing them in the North So the only trick to growing cacti in the north is to grow the proper varieties. Better Homes and Gardens has a good article on just that right here. Contain Your Cactus If you don’t want to be held back by your climate, keep in mind cacti do well in containers. They can be brought inside during the winter to a sun room or other bright warm space. Three tips for you… Use gloves. Another duh. Use a well drained soil mix made for cacti. Don’t over water.


  Texture, Design and Interest So here is where the appreciation for cacti comes in. Fewer plants on this earth have such amazing adaptive qualities. They are a lesson in form and function, in the beauty of Mother Nature and a lesson in her harshness as well. Used in a repeat pattern they are an exceptional design element. Nothing adds more texture and interest to a garden. Aren’t convinced? Check out these inspiring photos.


  Growing cactus can be an adventure in modern gardening, and can be the beginning of a whole new obsession no matter where you live!
0
0
文章
Gina
2017年05月23日
Gina

Forcing bulbs for the holidays, or for holiday gifts is a great idea to start now, when fall bulbs are available. You have a variety of healthy stock to choose from this time of year, and it really is an easy project! All is takes is some basic materials, fall bulbs, and a little room to store them until they bloom. Here is how to force bulbs for the holidays. The most popular bulbs to force for the holidays are Paperwhite Narcissus and Amaryllis.  The Paperwhites are fragrant, delicate and smaller. Amaryllis is a large bulb and a larger plant, with large flowers in a  variety of colors. Red is an obvious holiday choice, but try white for a fresh option that can take you through the New Year. How to Force Paperwhites
Paperwhites are easy to force in a tall glass container, with some decorative gravel. The tall container helps to support the plants as they grow. I like to add a little charcoal from the indoor plant section to keep the water smelling sweet. Purchase firm, full, blemish free bulbs. When forcing in particular, quality counts. Pour in two inches of pebbles that have been rinsed. Add a tablespoon or two of rinsed  charcoal then more pebbles. Place bulbs, root-side down and almost touching one another, on top. Add enough tepid water to reach just below the bottoms of the bulbs. Replenish when the level falls by a quarter inch. Paperwhites will bloom in four to six weeks, so if you are planting as gifts, count backwards in the calendar from the proposed gift giving time. How to Force Amaryllis
Force Amaryllis in a watertight, shallow container.  Fill the container until two thirds full, add charcoal bits as desired. Fill with slightly warm water until they just barely cover the pebbles. Lay one Amaryllis bulb on top of the pebbles, root side down. Try to purchase a bulb with fleshy, healthy looking roots. Add more pebbles until you reach the neck of the bulb, to give it support as it grows. Add water as needed so that the water level touches the bottom of the bulb. It’s ok to reach a finger down into the pebbles to check the level every couple of days. If you have a container that fits the bulb snugly, you can force Amaryllis without any gravel at all. Amaryllis bloom in six to eight weeks. Neither Paperwhite nor Amaryllis will re-bloom after forcing, so it’s best to just discard the bulbs. That’s it! Stock up at fall bulb sales and plant extra for gifts, for holiday decor, or plant some every two weeks to keep bulbs flowering right through to spring!
1
0
文章
举报 反馈

您有什么意见或建议,欢迎给我们留言。

请输入内容
设置
VIP
退出登录
分享

分享好文,绿手指(GFinger)养花助手见证你的成长。

请前往电脑端操作

请前往电脑端操作

转发
插入话题
提醒好友
发布
/
提交成功 提交失败 最大图片质量 成功 警告 啊哦! 出了点小问题 转发成功 举报 转发 显示更多 _zh 文章 求助 动态 刚刚 回复 邀你一起尬聊! 表情 添加图片 评论 仅支持 .JPG .JPEG .PNG .GIF 图片尺寸不得小于300*300px 最少上传一张图片 请输入内容