首页
动态
文章
百科
花园
设置
简体中文
已关注
+
关注
花园里是空的哦~
还没有添加花。
动态 (26)
Hande Salcan
2017年05月23日
Hande Salcan

There are ways to get free plants for your garden, and I don’t mean bribing the checker at the home improvement store. Nope, these are more satisfying anyway! The way to get free plants is to propagate plants that already exist, either from your own garden, or a neighbor or gardening buddies. To propagate means to basically cause the plant to multiply… thus taking one plant, and turning it into several, or even many! Free plants! There are many ways to propagate plants, but many of them are too complicated for the average gardener, and usually take extreme patience and a greenhouse. I’m going to concentrate on the ones that are easy and within the ability of even a beginner.  These methods include gathering seed, division, softwood cuttings, and leaf cuttings. Our feature photo, above, is a great example of division by cuttings… ‘Cafe Sucre Furine’ shows us how to propagate basil by cuttings. (Keep reading, we cover it!) I’m not going to get detailed about seed saving, because we just did a post on that, but you should jump over to learn all our seed saving tips. Division is an easy process that splits one plant into several, best done in spring or fall. Any plant that grows with more than one central “stalk” is technically a candidate for division, but certain plants are easier pickings. In other words, plants that grow in “clumps”.  Good choices? Most perennials without a taproot, such as hostas, day lilies, iris, grasses, phlox, coneflower, black eyed susans, asters and astilbe. (And many, many more!) The basic steps? Dig up the plant with a sharp spade Separate the crowns to make new plants. You can tease the roots apart with your fingers with some plants, but others you may have to cut them with a knife. Don’t worry, they will be fine! Replant each crown you separated as a new plant immediately, and water well until they get established. Check out this video on dividing perennials from ‘Fine Gardening’. Softwood cuttings are kind of like when we cut a stem of a houseplant and stick it in a glass of water until it grows roots, except we stick it into moist potting soil and trap it with a plastic bag. (OK, you can just stick some plants into water, let’s be honest… some are just so easy!) Photo credit below – Education Outside at AFY.
  If you want to try softwood cuttings on plants with tougher stems, like hydrangeas, follow this tutorial by ‘This Old House‘… this should work for many soft stemmed shrubs. This is just a touch more work, but don’t let it scare you. And when they mention rooting hormone powder and you start to panic, don’t worry. Just ask for it at your local nursery, it looks like cornstarch and just helps… you can do it without though. Don’t believe me? Here is a softwood cutting tutorial for softer stemmed perennials and herbs from ‘Mother Earth Living’… and they agree with me, it doesn’t have to be that complicated!
  The last easy method is propagation by leaf cuttings. What this means is you basically cut off a leaf and some of the stem, then plant it into soil medium just like you did for softwood cuttings. This works really well with succulents, which are so popular right now. In fact in my garden, these propagate themselves. When a windstorm breaks off some stem or leaves, they replant themselves everywhere! So really, how hard can it be? (My sedum “Angelina” is a main offender, but I love it!) Wikihow has a great tutorial on how to propagate succulents by leaf cutting.
Ok, so that’s it! Easy ways to make free plants for your garden, or host a swap party with family and friends and share!
9
0
文章
Hande Salcan
2017年05月23日
Hande Salcan

Your garden doesn’t have to be a flamboyant display of bright blooms to be a “garden”. In fact, some of the most interesting gardens in the world rely on foliage to supply color and interest. Green is not the only color of leaves, either. The plant world is full of varied choices full of color, texture and form that can carry off a fun, whimsical space, or the most formal and elegant of gardens. How, and why would we garden with just foliage, not flowers? Glad you asked…
Why? Foliage gardens require less upkeep, since they don’t require the deadheading that flowering plants do. Green is one of the most visually calming colors, so planting a garden with foliage tends to make a space worth relaxing in. Without flowers, a visitor to the garden tends to look closer, appreciating the texture of a leaf, and the variations of color and form. In short, a foliage garden can be a plant lovers dream. An ‘all foliage’ garden tends to look pretty for a longer season…flowering plants use so much energy – they tend to go quiet a good part of the year when they aren’t in flower.
How to Use Foliage, not Flowers First of all, the same old rules of design apply to foliage plants. Plant in groups of 3 or more, and contrast textures, form and colors. This is easier to do in a foliage garden because you don’t have the changing colors of flowers at different times of the year to think about when planting the original design. What yous see, is generally what you will get all season long, with minor exceptions. Plant sun plants in sun, shade plants in shade. Plant water loving plants together so they can get extra attention from the hose, and drought tolerant plants farther out where they might not get watered as frequently. Learn what colored foliage looks best with what. There are all kinds of guidelines out there, but I say this is the place to experiment and learn about basic design by trying different combinations. Some places to start? Yellow/green varieties tend to contrast nicely with gray or purple leaved plants. Variegated or pattered leaves look best next to a solid green for contrast, without looking too busy. Brightly colored foliage, such as reds look best as a focal plantings, with simple leaves nearby to set them off. Don’t forget about form and texture, which can be very important when you are using just leaves for your garden interest. Large, bold leaved hostas look amazing next to the fern like leaves of a bleeding-heart. A tall vertical ornamental grass may be a great “exclamation point” to break up a bed of low growing sedums. You get the idea. Contrast.
Now that you have the gist of it, try foliage plants for gardens. Or try a small foliage garden in one corner with just three. It’s a great way for any plant lover to really get to know what gardening is all about, and a great design lesson too. I want to thoroughly recommend a book called Fine Foliage by Karen Chapman  and Christina Salwitz. This book was a best gardening book Amazon 2013, and with good reason. Great photos, and great advice for foliage combinations. (And no, I don’t get anything for saying that! They also have a great gardening blog as well, with amazing ideas. So give foliage gardening a go, it’s rewarding and lower maintenance as well.
1
0
文章
Hande Salcan
2017年05月23日
Hande Salcan

The early spring might be the best time of year to get out and organize your garden shed… The best part is that it gets you out in the garden, even though there is little to do in the way of planting and caring for your garden space. Oh, yea, it also saves you time, money and aggravation. But really, it gets you out in the garden, and when can that ever be a bad thing? Seriously, getting your garden shed organized will make a big difference once the growing season is in full swing. You won’t spend hours looking for that twine to tie up the beans, you won’t run out to buy an expensive new rake, only to find the perfectly serviceable old one in the back of the shed behind the mower, and you most of all, it will allow you to utilize your precious gardening time for just that…gardening! So use these tips and ideas to organize your garden shed or space! The way I see it, you can do this in three steps… Step one – Organize the big stuff! For your large tools, keeping them from falling all over the floor, or even hurting someone is key. This is a DIY solution to tool storage. Cut pieces of scrap PVC pipe into sections, then screw into the wall as shown. Label if desired. Find the tutorial here at AshBee Design.
  Gardenista shows us how to round up a garden shed with a roll of velcro!
  And also, using a peg system to store your gardening tools on the wall.
  Step two- Organize the small stuff! Using an old toilet paper holder to keep string and twine right where you left it… clever!
  Use old crates to create shelving and storage areas. This is really useful where you cannot attach storage to a wall, like around a window.
  From Our Little Acre, again using recycled wood, this pallet project for garden shed storage is so smart and creative. You could add as many hooks as you needed for all your hand tools.
  Step Three-  Organize the process! What do I mean by that? Get your head in the game… For example… Use ribbon and clothespins to to keep track of the garden chores by month… Thanks BHG !
  Finally, keep a calendar in your garden shed… and not just to keep track of the chores! Mark down when your lilacs bloomed this year, whether the zinnias looked good next to the zebra grass, and what week in July the potato beetles attacked. Few of us remember to write these things down once we get back to the house, and this kind of information can be invaluable to a gardener. Oh, and yes, you should also write down the chores. ;)
3
0
文章
Hande Salcan
2017年05月23日
Hande Salcan

I never like to use the word “chores” (ick!) when it comes to gardening, but let’s face it…there are a few things we need to do each season to keep our garden healthy and productive. Frankly, the fall prep can be a little tough for me…after all, it can be hard to see how it will affect your garden months down the road. (Even when you know better ’cause you read all my good advice. :) But spring prep, now that’s a diff story. You get to see the results of your efforts quickly, and besides, the first stirrings of spring is enough to prod you along to get these (not chores) done. And I don’t know about you, but after this winter, I’d do anything to get outside, even prep! (Again, not chores.) So here is your spring garden prep checklist that you can start working on as the snow melts (and it will!) and the temperatures warm! 1. Pull out the toolbox, cause it’s time to repair! Before you are kept busy pulling weeds, planting and designing, and harvesting veggies, make sure anything that has been put aside for repairs gets fixed. Stepping stones heaved from the ground? Time to lay them back in flush with the ground. Solar path lights not working? Repair or replace! 2. Time to cut it all back. Perennials and some shrubs need to have all the old dead growth cut back in early spring, to allow them to regrow with plenty of light and air circulation. (Also, it’s prettier!) If you haven’t cut back your ornamental grasses and rose bushes, the sooner the better. 3. Clean it up! Scrub out containers to get them ready for new designs this spring and summer, any tools that missed your fall prep need to be cleaned and possibly oiled, birdhouses, ponds and fountains all need a good cleaning out and checking over. If your spring bulbs are covered with a mash of fall leaves, clean them up so they won’t rot underneath. 4. Plant bare root roses and trees and shrubs. This is a great time to get good deals on bare root plants… get them in the ground before the weather warms too much. Tip: Make sure you already know where the plant is going to go when you bring it home… Bare root plants are great until they break dormancy, then you better hope they are in the ground already! It’s really easy to set a new rose bush or two aside until you decide where to put them, only to find them dried out and stunted because they broke dormancy without the benefit of soil and water.
5. If you have some perennials that were crowded last season, or you just want to create more plants, now is the time to divide those perennials. 6. Check for watering needs. If you have had a dry winter, make sure you give all your plants a good long drink to help them wake up to spring. In mid-late spring you can begin your fertilizing schedule. 7. Now the fun part…plant something! Early spring veggies, pansies and primroses, and new perennials are prime for planting in spring. Make sure after all the (not chores) you reward yourself by doing the one thing you’ve been waiting to do all winter…get your hands in the soil, and nurture a living plant (or five)! Was that so hard? And besides, it got you out in the garden! I know, I say that a lot. :)
3
0
文章
Hande Salcan
2017年05月23日
Hande Salcan

Just because the weather is turning cooler is no reason to turn your back on the garden! In fact, giving your garden a little extra time now can help you have a great gardening season next year. It also happens to be an excellent time to get out and dig in the dirt, get a little exercise, and dream about the changes you are going to make in your garden design. Cooler weather and fewer outdoor activities create the perfect excuse to complete this fall garden checklist! Amend Your Soil This is a great time of year to work compost into your soil to improve the texture, drainage or available nutrients. Till in compost from your own yard and kitchen waste, or pick up a couple bags at the store. Do this every fall to have the best garden on the block. This is the number one thing you can do to improve your garden results for next year! Clean Up! Yea, you knew I was getting to this… Maybe not the most fun part of fall gardening, but important just the same. Pull out dead or diseased plants and dispose of them. Clean up plant matter at the base of plants and throughout beds. Doing this will make it harder for pests and disease to invade the garden come spring. Mulch Your Tenders If you have plants that are borderline in your cold zone, and you would like to try to get them through the winter, make sure you mulch them with a layer of at least 2-3 inches thick. If you mulch trees and evergreens, leave a gap around the base of the trunk to prevent pests from munching. Order Your Bulbs If you have always admired those tulips and daffodils in the neighbors yard, well now is the time to set up your own little spring show. Order your bulbs now for best selection online, and plant in late fall before the ground freezes. Divide Perennials Now is the time to dig up those overgrown perennials, divide them into smaller plants, and replant. Doing it now instead of spring gives the new plants a chance to put down roots and be ready to go when winter is over. How to Divide Perennials Feed the Birds If you haven’t been feeding the birds all summer, now is a great time to start as their natural food becomes more scarce in autumn. 5 Upcycled Bird Houses, Feeders and Baths! Feed the Lawn! If you want that rich green lawn in spring, it needs some attention now. Talk to your local nursery about the right nutrients to apply to your lawn in fall, and get fertilizing one last time!
Sprinkler Care In late fall, empty all hoses, place faucet protectors, and have your underground systems winterized.
Plant Fall Annuals Mums, pansies and kale will fill those planters and pots well into fall, so get to planting! Enjoy! This is the perfect time of year to enjoy a cup of tea or glass of wine in the garden, and watch the natural world slowly get sleepy. It’s a calming feeling to wait for the coming of winter, because it reminds us there is a season for every thing, and things do change, but that spring will return again! Here is a wonderful infographic that we came upon and thought we would add to this post – on how to prepare your yard for winter. Check it out. Some good info here.
2
0
文章
Hande Salcan
2017年05月23日
Hande Salcan

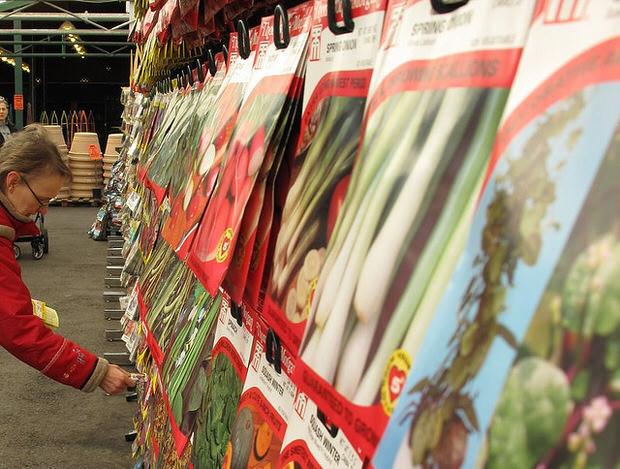
One of the hardest decisions a new gardener must make is where to buy their garden seeds and supplies. Here at The Garden Glove, we have several favorite seed catalogs and suppliers, and we update this list every January. This list has been updated for 2017. Here is some info on our top picks that we use ourselves, and our experience with them, along with their website information. Log onto their websites and request their catalogs today to have seeds in time for spring planting! Or order online like I do… And check out our favorite choices for buying live plants online at the end! Update: Some companies, in order to save on waste, no longer print paper catalogs… Their catalogs are online only. While I do love curling up with a cup a tea and a stack of catalogs, consider doing the same with a tablet. I encourage companies to save all the trees they can, and besides… you get faster service with online ordering anyway!
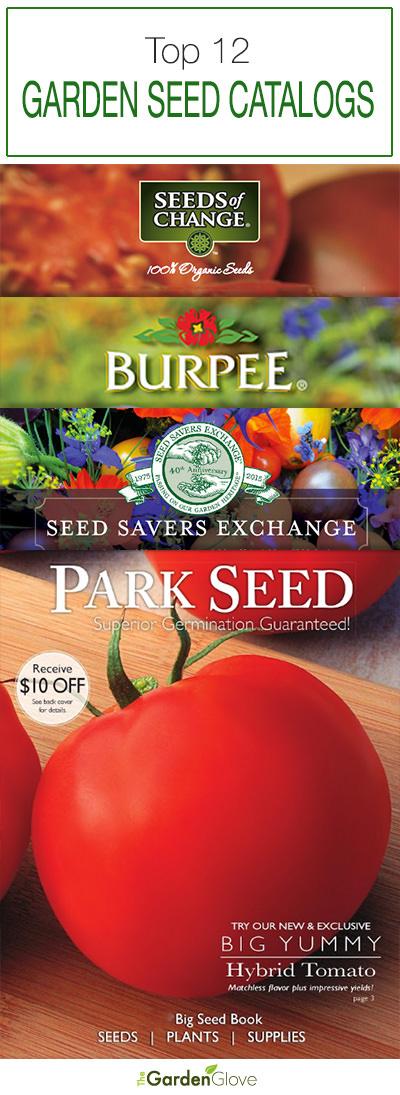
#1 Park Seed Park Seed always has a great selection of both flower and vegetable seeds, and some great herbs as well.  Prices are affordable, and seed packets have plenty of seeds. Seed is always fresh, and we get good to excellent germination rates from them. Shipping is fast, usually just a couple of days from order to in my mailbox! Highly recommended. They also offer some live plants as well. #2 Burpee Seeds Burpee has always had one of the most colorful catalogs, and a wide selection of seeds. They are especially good at their vegetable selections, so all you veggie gardeners, take note! Their new varieties are the ones to beat each year! #3 Thompson and Morgan Thompson and Morgan is an English seed supplier, but the ultimate in unusual seeds for the serious gardener. If gardening is your passion, you need this catalog. #4 Johnnys Selected Seeds As recommended by a reader, this company needs to be added to our list! Not only do they have an extensive seed catalog, they have lots of tips and resources there as well. Johnny has a longstanding reputation as a quality company in the gardening community! Oh, and it’s an employee owned company! #5 Pinetree Garden Seeds Pinetree Garden Seeds was one of the first seed companies I ever used. They specialize in smaller packets for the average home gardener, at smaller prices. Most of us will never need the hundreds of seeds in the average seed packet, so why pay for it? They have a good selection, fast shipping and good customer service. #6 Renee’s Garden Seeds Renees Garden has grown into one of the most trusted suppliers of seeds for organic and heirloom varieties… So if you crave a little history with your salad, this is the spot for you! #7 Select Seeds If you grow flowers and want antique varieties your grandmother grew, this is the place. I love the idea of nostalgia in the garden…so did Thomas Jefferson, one of the most eminent gardeners in our country’s history. #8 Seed Savers Exchange Seed savers is a non profit company that is a wonderful source of information on heirloom and open pollinated seed, as well as one of the top sources for such seeds. Not only does the free catalog list all their seeds, their sites educates us on why it is important to save heirloom varieties, and even has an online garden planner that’s got a 30 day free trial. (No, you don’t have to give your credit card!) This is a time honored company and trusted company worth looking into if you wish to preserve our heritage plants! #9 Seeds of Change Going organic in the New Year? Seeds of Change is a catalog you need for your veggie garden. Great selection of 100% certified organic seeds. #10 Cooks Garden Are you a gourmet cook, or just want to be? Cooks Garden has veggie varieties that are difficult to find on your garden center rack… amazing in flavor and color… Beautiful catalog! #11 Nichols Garden Nursery This is a family owned business that has a stellar reputation for quality and customer service. They do not sell any seed that has been genetically modified, and they specialize in fine and rare seeds, herbs and goods for the gardener cook. Love their amazing selection! #12 Bountiful Gardens We wanted to include this selection this year because this company is a product of Ecology Action, a not for profit that teaches sustainable agriculture to end world hunger… Their catalog is full of great growing tips, and all their seed is heirloom, non GMO, and certified organic. To quote their website “It doesn’t take much to get started, no gizmos or expensive equipment. If you have some soil, all you need is simple tools, seeds, and the information to use them.” Order some catalogs today, or visit their online catalogs for faster service, and start dreaming of your spring garden!
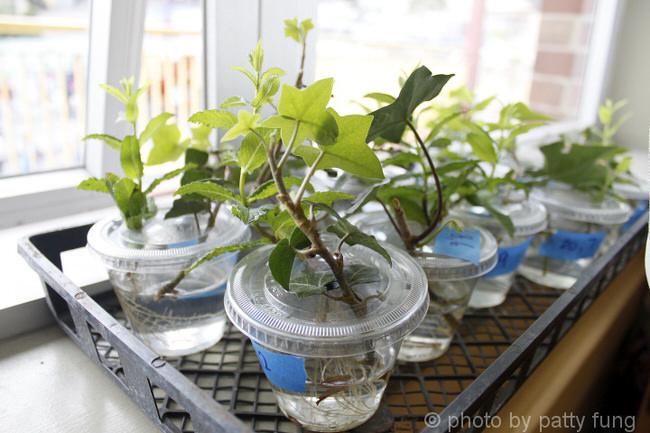
Plants If you want to order top quality, affordable perennials and shrubs, I highly recommend Bluestone Perennials. I have ordered from them again and again, and never been disappointed. Check their internet specials often! White Flower Farms has top of the line plants for decent prices, and partners with the like of Family Circle and BHG. If you are looking for the latest varieties or unique plants, Wayside Gardens is the place… can be a little pricey, but thats because they offer varieties and quality seldom found online.
2
0
文章
Hande Salcan
2017年05月23日
Hande Salcan
Bamboo is a great choice for specimen planting or for screening, and it can be easy to grow if you know how to manage it. It fits in with most garden styles, and there are varieties of nearly every size and for every hardiness zone. Here are the basics on how to grow bamboo in your garden! Types of Bamboo There are basically two types of bamboo. Running bamboo is the type you have been warned about that can take over your entire yard (and the next one) in a pretty darn short time, turning it into a tropical jungle. But with some tricks, you can grow it!
Clumping bamboo is more well contained, and while it still spreads underground, it is much slower and controlled. This is a better choice for the casual gardener, or those with limited space but who still want to enjoy the beauty of graceful bamboo. Bamboo Basics Both types of bamboo have tropical varieties meant for warmer climates, and mountainous varieties hardy down to -15 degrees or more. Check your nursery tag. Choose a bamboo that has a mature height that fits in with the scale of the effect you desire. Screening bamboos can be taller, specimens can be shorter. Bamboo requires well drained soil. For the first two years in the ground, water your bamboo well. Fertilize once in the spring. If you are trying to prevent running bamboo from, well, running… don’t fertilize as often. Check on whether your variety prefers full sun, or some afternoon shade. Prune back to the ground old, dull culms every year. (Culms are the upright “blades” of bamboo.) Some gardeners prefer to prune off any branches that extend horizontally, so that all culms run vertically straight up for a graphic and striking effect. If you have culms flopping over, they probably require more water, less feritlizer. You can prune back the height to help them recover, or just prune them down altogether. How to Grow Running Bamboo If you have found a species of running bamboo that you just have to try, you will have to contain the underground roots from spreading beyond your planting area. There are several ways to achieve this. You can transplant your nursery bamboo into a large pot, then plant the whole pot into the ground. Leave the collar of the pot above ground. Cover with mulch if you find it unsightly. Another option is to place a plastic or concrete barrier at least 12-18 inches below the soil. Bamboo are shallow rooted so this should prevent the bamboo from running away. You can prune back to the ground any culms that escape beyond the barrier. Finally, you can dig a 12 inch deep trench around the area you would like to contain the bamboo too. Fill with sand, then several times a season, pull back the sand and prune back any roots that have poked through into the trench.
How to Grow Clumping Bamboo Clumping Bamboo is much less likely to run rampant across your property. Many varieties are quite polite in fact. Make sure you check the size and space requirements of the variety you purchase.
Bamboo in Containers Both types of bamboo can be grown successfully in containers. This is the lowest maintenance option, and can help maintain the health of the rest of your garden. Be sure to choose a container large enough to be in scale with the eventual height of your variety.
Bamboo is not the garden evil that urban legend portrays…as long as you tend to it’s needs. It can turn a ho hum yard into a stunning garden in a short time, with these few bamboo growing tips and tricks. So are you brave enough to give it a try?
3
0
文章
Hande Salcan
2017年05月23日
Hande Salcan

When the end of the season nears, serious gardeners should think about saving seeds from their own plants, to prepare for next season’s seed starting. Why save your own seed? Saving your own seed is a budget friendly way to replant next year, after all, you pay for the seed or plant once, and you can keep saving the seed year after year! Saving seed protects biodiversity. In other words, we save seed and protect those varieties from being lost to the generations of hybridizing. So many plants our great grandparents grew simply no longer exist… and that’s as tragic a loss as extinct animals. It allows you to grow plants that do well in your garden, and over time, those seeds adapt to your growing conditions. Basically, you are growing “The Johnsons special corn seed”, and it would be true! After a few years, your seed has adapted to grow better in your garden then anywhere else on earth…and that is an amazing thing. You are guaranteed not to have seed that’s been treated in any way. After all, you are your own seed company! You can trade seed with friends,  or participate in a seed lending program like some libraries are now sponsoring. Find out more about seed lending from the Washington state seed lending “library”. Many cities have these now. Imagine the possibilities. Search for one in your area. It’s fun and educational. And it just makes you feel self-sufficient, doesn’t it? Do remember, hybridized plants seeds’ will revert back to their parent plant. Look for open pollinated plants to grow true from seed. You can find more information on that at Organic Gardening. (Also a good beginners guide!) Let’s start with the basics. The Farmer’s Almanac has a tutorial on beginning seed saving for vegetables. Start here, and get a feel for how easy it really is!
  Now that you have the basics down, ‘Grow Real Food’ has a chart of seed saving tips that is really helpful, and gives you specific information plant by plant. This would be great to print out and include in your gardening journal!
  ‘Tipnut’ has a good tutorial on saving tomato seeds, and includes a tip on getting heirloom varieties from a farmers market… That way, you know how they look and taste, and also that they grow well in your area. Then you can harvest seed directly from your farmers market tomato! ‘Weekend Gardener’ has a primer on saving flower seeds from annuals, for those of you who just can’t let those petunias go!
  Now that you have your seeds, you need a way to store them! ‘Erin Vale Designs’ shows us how to make these DIY seed packets from scrapbook paper. I love this because you could choose any color or design to match your personality. These also would make lovely place cards for a garden party! Be sure to scroll to the bottom and click on the download buttons to find the designs for the packet.
  If you just want to print out packets, ‘The Prudent Homemaker’ has this free pdf for printing these really nice seed packets… Great for gift giving, and gives space to write information on the variety, date, etc…
  Don’t like the idea of packets? Found this idea on Cottage in the Oaks. Paint the tops of old spice jars with chalkboard paint! That way, each year they can be reused for different seeds!
2
0
文章
Hande Salcan
2017年05月23日
Hande Salcan
If you are a gardener, chances are you have thought about starting a compost bin. Not only is it great for the planet, but it can help you create “garden gold” and transform your soil into a healthier home for all your plants! Although there are compost bins you can purchase, they tend to be expensive, hard to transport and sometimes downright inefficient. If you don’t know how composting works, take a couple minutes and visit our quick primer on composting techniques, then jump on back here and pick one of these 12 creative DIY compost bins, and get started! Feature photo below, is from ‘A-Z West‘.
Our first tutorial from ‘Practically Functional’ is a DIY compost bin that has the details… A latching lid, sturdy construction, access to soil at the bottom, and my fav… You can easily open the lid with one hand to dump in the kitchen scraps! Lot’s of step by step directions, photos and drawings.
  For those of you who want to use the three bin system and get really serious, this DIY compost bin from ‘Apartment Therapy’ even looks good… Links on how to get the plans for this project are included in their post.
  So we love the compact, easy nature of this DIY garbage can compost bin by ‘Full Measure of Happiness’, but unfortunately, that site has gone to the big bloggers resting place in the sky… No worries, keep reading!
  Fortunately for all of us, Toni at ‘The Happy Housewife’ has a full tutorial on making a DIY compost bin from a garbage can! Love the pics of her boys “rotating” the bin!
  So, maybe you don’t have adorable little boys (or girls!) to push your compost bin around the yard? (Or maybe you do, but they no longer think it’s a cool play-toy. ): ) Using the same idea, this garbage can composter from ‘Instructables’ is on a stand that you rotate the compost bin on. Pretty clever!
  If you want to recycle while creating your bin, make this DIY compost bin from pallets from ‘DIY Ready’. Did we mention cheap?
  Don’t want to go through a bunch of construction? Make your own compost bin from wire hardware cloth or chicken wire with this tutorial by ‘Mother Earth Living’.
  Keep recycling and protecting the earth by making this shower door compost bin from ‘Organic Gardening Magazine’. The shower door acts like a bit of a greenhouse and heats up the compost, making it decompose faster. You can pick one up at a Habitat for Humanity Restore or a similar store near you.
  This low cost compost bin from ‘Instructables’ allows you to remove any side, and the whole thing is easily movable as well. Made from inexpensive fence pickets, this is an easy garden project.
  From ‘Blue Planet, Green Living’, this DIY compost bin is different in that it’s made using concrete blocks. This makes it easy to make the bin larger or smaller, depending on the needs of that season, keep out critters, or even remove blocks to allow for more ventilation.
  Lastly, these compost bins from ‘Birds and Blooms’ are made of cedar, and allow the boards at the bottom to slide out. This lets you remove finished compost from the bottom of the pile, while continuing to add to the top of the pile.
2
0
文章
举报 反馈

您有什么意见或建议,欢迎给我们留言。

请输入内容
设置
VIP
退出登录
分享

分享好文,绿手指(GFinger)养花助手见证你的成长。

请前往电脑端操作

请前往电脑端操作

转发
插入话题
提醒好友
发布
/
提交成功 提交失败 最大图片质量 成功 警告 啊哦! 出了点小问题 转发成功 举报 转发 显示更多 _zh 文章 求助 动态 刚刚 回复 邀你一起尬聊! 表情 添加图片 评论 仅支持 .JPG .JPEG .PNG .GIF 图片尺寸不得小于300*300px 最少上传一张图片 请输入内容