首页
动态
文章
百科
花园
设置
简体中文
已关注
+
关注
花园里是空的哦~
还没有添加花。
动态 (26)
Hande Salcan
2017年05月23日
Hande Salcan

Garden a little boring? Have no idea why? Chances are that it needs a design shake up. The basic principles of design should come into play when designing your garden,  and using texture in the garden is one of the quickest ways to add interest and give it that “designed” feel. What do I mean when I talk about texture in the garden, and how do you use it? There are three easy ways to utilize texture when planning, re-vamping, or just changing things up in the garden. What is Texture in the Garden? Texture is the combined look of all the surface elements of a garden working together, and is usually defined by being fine, medium or bold textured. Fine textured plants and elements are usually wispy and delicate, and look better in broad groups and swaths than alone. An example would be airy Queen Annes Lace. Bold texture are plants with wide, strong leaves or flowers and usually demand a lot of attention. The most common examples are hostas. Medium texture in the garden is just that… medium. Which includes just about everything else! Most plants are medium textured.  The photo below shows all three textures working together in a garden.
How to Use Texture The trick to using texture in the garden is to realize what you want from your space. Lots of bold texture is usually a space with much more drama and possibly formality. A space with mostly fine texture tends to be very casual, natural and free flowing. The idea is to  find a mix that works for you. Is your garden too bold and hard looking? Add some fine texture to soften it. Too boring, as if everything is lost? Contrast fine texture with bolder plants or elements. The mix that is right for everyone is different, and I do not believe in rules in a personal garden. Part of the joy of gardening is discovering these things about your plants and your space, and working to create the feeling you want.
Three Ways to Add Texture Foliage – This is as simple as bringing in new plants to the garden to add contrast to the texture that is already there. Think of the shape and size of the leaves, and also any pattern and color they carry, as they affect the overall feel of texture as well. A hosta with variegated leaves will look finer in texture than one of the same size that has no striping. Dark foliage looks bolder than bright.
  Flowers – Flowers carry more impact for texture during the summer months, but if that is when you use your garden the most, then make sure you use them! Roses are quite bold in texture, while lavender is much finer. Remember too, you can increase the visual texture (whether bold or fine) by increasing the number of plants in a group. For instance, adding ten roses to a corner of the yard will add a lot more bold texture then adding just one.
  Hardscaping – Don’t forget the hard elements of your garden, as they have visual texture too. Fine gravel, bold concrete, larger jagged flagstone, or herringbone laid brick.
Use texture in the garden to add interest and make your nature space something special. It’s easy!
1
0
文章
Hande Salcan
2017年05月23日
Hande Salcan

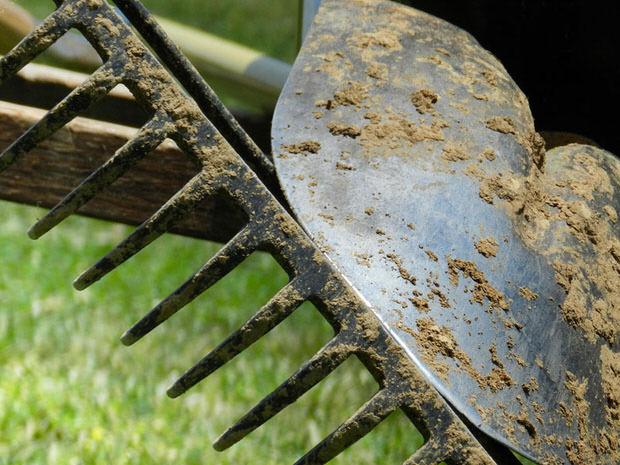
It can be easy and inexpensive to start garden seeds indoors for spring planting. Here at The Garden Glove, we use several methods. Method
#1 – Purchase an inexpensive dome style seed starter from your local garden center or discount store. These usually sell for less than $10, and contain everything except the seeds to get you growing, including a humidity dome to keep in heat, and soil or soil less cubes. The only downside to these is that the growing blocks are usually pretty small, so if you are going to plant fast growing annuals such as sunflowers, morning glories or squash, you might want to wait to just two weeks before last frost. Otherwise, you will have to transplant your seedlings into larger containers as they outgrow the seed dome. This method works very well for growing perennials, since they are slower growing than annuals as a rule. Make sure the growing medium is moist, place the seeds at the depth recommended by the packet, and place the dome on. You will see moisture condense inside the dome. This is great for starting out, as the heat and moisture is trapped in. However, once seedlings start to appear, you MUST remove the dome to prevent “damping off” a fungal disease that will kill the seedlings. Add water as necessary to keep the soil moist, but not wet.
Method #2 – The second method is the most economical one. This is where we plant seed into reusable or recycled containers. These containers must have drainage, and be able to be moved easily. Tupperware, egg cartons or pots made from recycled newspaper are several popular ideas. Placed on a tray, such as an old cookie sheet- they make great planting flats, if not too terribly attractive. It helps when using this method to enclose the entire tray in a clear plastic bag until seedlings appear. This does the same job as the $10 dome, by keeping in heat and moisture. Hee is a tutorial from Hobby Room Diaries on making newspaper pots!
  Method #3 – This is my preferred method, and one I just started using two years ago. I picked up a portable greenhouse. It has several metal shelves for seedling flats covered by a poly “tent” to keep in heat and moisture. This makes it very easy for me to move the entire set up outdoors for daylight, and the tent keeps the heat in, even when it hovers near freezing outside. I can grow several hundred seedlings in this setup. I caution you against leaving it outdoors during windy conditions, however. Also keep in mind during sunny days it can heat up inside the greenhouse quite quickly, so make sure you tie up one side and occasionally monitor the temps in your greenhouse. When the weather is warm enough, remove the poly tenting entirely.
Once the seedlings are up, they must have very bright, though not direct light. Using a windowsill during bad weather is acceptable, but to grow healthy and strong, seedlings should be placed in either artificial light, or on a protected porch for much of the day. Make sure you bring them in at night, and don’t leave them out on frosty weather. You can create an artificial light system easily with a cheap shop light from the home improvement store, and a both a warm and cool 40 watt fluorescent tube. It does not have to be one of the more expensive plant growing tubes. Hang the lights from chains off a scrap 2×4 stand. Keep the lights very close to the seedlings, and leave on for at least 12 hours a day. Starting garden seeds indoors will save you money and allow you to grow plant varieties in your garden that are special and unusual. It’s easy, so try starting your seeds indoors today!
0
0
文章
Hande Salcan
2017年05月23日
Hande Salcan

We’ve all loved ’em… the ever dreamed about, garden
#hydrangea . So popular, they are the number one wedding flower after roses. So beloved, few people have no memories of a hydrangea moment…yes, especially us girls… They are romantic, and amazing. Sigh…. The good news is, there is a hydrangea to fit most gardens in most areas of the country. Shade or sun, acid soil or alkaline. Yes, they can be a little finicky. Yes, they are absolutely worth it! Here is the skinny on growing the best hydrangeas, for garden or table. (Or both!) Although most of us probably think of the old fashioned mophead hydrangea (H. macrophylla)  first, with those amazing balls of bloom in pink or blue, there are other varieties. Oakleaf hydrangeas grow well in partial shade, and lace cap hydrangeas have a more delicate flower. There is also the more heat tolerant PeeGee hydrangea, H. paniculata. And if that isn’t enough variety, there are now the new reblooming hydrangeas, like “Endless Summer”. First, basic hydrangea care, then we will look at the different varieties so that you can choose the right one for your garden! Hydrangea Basics Sun and Shade Most hydrangeas prefer morning sun and afternoon shade, and don’t deal well with hot climates. Coastal climates are ideal, as are cool summer areas. Both too much heat and too little sun can contribute to poor performance for old fashioned hydrangeas. PeeGee hydrangeas deal much better with heat. Oak leaf hydrangeas are perfect for partial shade areas. No hydrangea will bloom in deep shade. Water and Fertilizer Hydrangeas prefer to be evenly moist, and love a fertile spoil. That having been said, when using commercial fertilizers, it’s often advised to use half strength liquid fertilizer so you don’t stimulate too much leaf growth at the expense of the flowers. Pruning Most (except re-bloomers) bloom on old wood, so severe pruning is not necessary. Prune away dead wood each spring, and dead head the flowers that are past their prime to promote the most flowers on each bush. PeeGee and Annabelle hydrangeas are more tolerant. Soil Hydrangeas prefer soil rich in organic matter. You may have heard that you can change the color of a hydrangeas blooms based on soil composition. It’s true that the pink and blue varieties are influenced by the soil ph. You can change a pink hydrangea to blue by adding aluminum sulfate to the soil to make it more acidic.  It is pretty difficult to change a blue hydrangea to pink… Problems The biggest problems hydrangea gardeners have is lack of bloom… This is usually caused by one of three things… a late freeze, using a variety that is not intended for your climate, or pruning too much of the old wood away. KariAnne of Thistlewood Farms has a mantel full of beautiful blooms that convince me she’s found the secret! Check out her advice on getting hydrangeas to bloom.
  Varieties Mopheads – Hydrangea macrophylla. Traditional pink or blue hydrangeas. Hate summer heat. (Photo – Mopheads on right, Lacecaps on left)
  Lacecaps – Hydrangea macrophylla normalis. Lacey and more easily naturalized into the average landscape, these shrubs are less formal, but still amazing specimen plants. Oakleaf – H. arborescens. Oakleaf hydrangea had oak shaped leaves that turn lovely purple and red in the fall, and conical shaped white flowers that bloom in summer. More tolerant to hot summers, tolerant to shade, and tolerant to drier soil. Wonderful garden plant! PeeGee – Hydrangea paniculata. Large conical white to pink blooms, Peegee’s tolerate cold and require several hours of sun a day. They can grow quite large, and are tolerant to pruning, so can be used as a hedge. They also bloom a little later, August and September. They are the only variety that can be pruned into tree form.
  Cold zone hydrangeas – Hydrangea arborescens “Annabelle” is a large white flowering variety that blooms and grows well in cold climate zones. Hardy down to zone 3, these flowers can be up to 10 inches across!
  Reblooming – Hydrangea macrophylla, the most popular new gaiety of the reblooming mop head is “Endless Summer”. These tend to be smaller shrubs, prefer partial shade, and bloom pink or blue. Reblooming several times over the summer, they are a popular choice for large containers as well.
It’s worth a little extra effort to learn about growing hydrangeas… they can survive in a garden for generations, and are a beloved flower that every gardener should have the chance to grow. UPDATE: Just ran across this new hydrangea from Wayside Gardens I just had to share… Hydrangea ‘Next Generation Pistachio’ is a compact grower, just 3-5 feet, loves a shady afternoon, and has an amazing lime green petal edged with pink! Zones 5-9.
2
0
文章
Hande Salcan
2017年05月23日
Hande Salcan

With cold weather approaching, it might be tempting to just push all the garden tools to the back of the shed and forget about them until nest season. However,  taking a little time and effort (this is pretty easy guys) now will not only make your tools last longer, it will also make them more enjoyable to use! Here’s how to winterize your garden tools. Shovels, rakes and spades Make sure you clean all the dirt off the blade and the handle. Use a small whetstone to sharpen the blade of the shovels, if you desire, or have the hardware store do it for you for a small fee. Trust me, shovels and spades are not meant to be dull… you will thank us when you go to plant your first tree in the spring and you can slice right into that chilly ground! Run some fine sandpaper over any wooden handles to remove splinters. Rub with a soft rag dipped in a bit of linseed oil. Rub some oil over the metal parts of the tools, or store in a bucket full of sand and a bit of oil to prevent rust. Store in a dry shed or garage.
  Hand Tools Your hand trowels should be treated the same as your full size tools. Pruners should be cleaned and oiled.
  Lawn Mowers You should have your lawn mower serviced before putting it away each fall. If you absolutely know that by the time you get it serviced, the first crocuses will be popping up, then take some DIY action. Drain the gas tank, or run it all the way empty. Clean the blades. Residue will create rust. Rub linseed oil over the blades, then store. Grass catchers can be hung on the wall of a shed or garage. It’s important they are kept away from moisture to prevent rotting.
  Other Power Garden Tools For your grass trimmers or edgers, make sure you clean them well with a good brush. Drain the gas, and remove the spark plugs. Easy maintenance for all your tools that will have you right out in the garden with he first Robin of spring, instead of in the shop, or running to the home improvement store to replace broken tools. And wouldn’t you rather be gardening?
1
0
文章
Hande Salcan
2017年05月23日
Hande Salcan

Making a DIY terrarium is a stylish and trendy garden project that is easy. Here is a simple tutorial on making and maintaining a terrarium garden in your home! Supplies: Glass container with open top Activated charcoal chips (in bags in the indoor potting mix department) Potting Soil Plants Sheet moss or decorative stones Planting tool (I like a long handled spoon) Choosing Plants to Fit the Container (Or vice-versa!) First, choose your plants for the terrarium. Most plants can adapt to terrarium living, but keep in mind the plants water needs. Plants that need less moisture such as cacti, sedums and succulents need a very open container, so that the moisture has a chance to escape. Tropical houseplants, or my fav, a variety of mosses love moisture, so the container can have more narrow opening, as they will thrive on the humidity. Choose small specimens that will fit easily in your container, and don’t overcrowd. You want to leave a little space between plants.
Start your Terrarium Start building your terrarium by adding a 1-2 inch layer of charcoal chips on the bottom. Now add your potting soil on top of the chips, packing gently as you go. Fill the container one third full. Pack down gently with your planting tool. Add Plants Now add your plants on top of the soil. Use your planting tool to add soil around the plant roots and gently pack down until the roots are covered. Add Decorative Stones or Moss Add small pieces of sheet moss between the plants, and/or decorative gravel or stones. Water until you see moisture at the bottom of the container.
Care of Your Terrarium You can water your terrarium with a container with a spout, or you can use a mister for moisture loving plants. Be sure to water only as often as needed. If you use plants that prefer dried conditions, make sure the soil dries out between watering. Use scissors to prune plants as necessary. Place in a bright spot, but never where the terrarium gets direct sun.
That’s it! Easy, inexpensive and you can personalize your DIY terrarium to your own tastes. Try making several different kinds of terrariums. Here at TGG we are planning an all succulent terrarium, one with several varieties of moss, and a miniature garden. Watch for pics as the projects finish! Have you seen some cool terrariums at shops near you? Share any unique ideas with us!
0
0
文章
Hande Salcan
2017年05月22日
Hande Salcan
Learn how to grow prickly pear cactus in this article. Growing prickly pear cactus and its care is not difficult, if you grow it in right growing conditions. USDA Zones— 9 – 11 Difficulty— Easy
Other Names— Barbary-fig Cactus, Cactus Pear Fruit, Gracemere-Pear, Indian-fig, Indian fig, Nopal Cactus, Oponce, Opuntia, Opuntia cardona, Opuntia ficus, Opuntia ficus-indica, Opuntia fuliginosa, Opuntia hyptiacantha, Opuntia lasciacantha, Opuntia macrocentra, Opuntia megacantha, Opuntia puberula, Opuntia streptacantha, Opuntia velutina, Opuntia violacea, Tuna Cardona, Westwood-Pear. Also known as Indian fig, prickly pear is a common succulent plant in Mediterranean and subtropical regions. It is grown as an ornamental plant and for its juicy fruits. Prickly pear cactus is undemanding and easy to grow. It grows about 1 – 2.5 m high. The flowers are very showy, colors ranging from white, yellow, to orange, depending more on the variety.How to Grow Prickly Pear CactusPropagation Prickly pear cactus can be propagated from seeds or pads. Growing prickly pear from the pad is comparatively easy than seeds. To facilitate the rooting, it is preferable to wait until the cuts are perfectly healed (about 1 – 2 week) before planting. Tuck them an inch deep on the ground or in containers. The rooting takes place in a short time, usually in a month. Save the rooting pad from afternoon sun and water it when top one inch of soil seems dry. Location Growing prickly pear cactus in a sunny location allows the plant to thrive and fruit. Prickly pear cactus is a tropical or subtropical plant, so it loves the warm exposure. However, it can withstand temperatures down to 14 F (-10 C), but in areas, with harsh winters it is best to plant it in a sheltered spot, near a wall or tall tree to protect it from cold drafts and fluctuation in temperature. If you’re living in a cooler climate, growing prickly pear cactus in a container is the better option for you as it can only be grown on the ground where winter temperature remains above 14 F (- 10 C). Requirements for Growing Prickly Pear CactusSoil Grow it in well-drained, sandy and loamy soil, avoid clay-rich soil that is not well draining and remains moist. For growing prickly pear cactus in a container use potting mix or 1/3 part each of compost, soil, and coarse sand or perlite. Watering Watering should be done only when the surface looks dry. On average, during the spring and summer, water it once or twice a week and during the fall and winter once or twice a month. If you’re living in tropics more frequent watering will be required. Repotting If growing in a pot, the plant must be repotted once it is root bound. Whenever you identify that the plant is growing slowly, repot it. The best repotting time is spring. Prickly Pear Cactus Care Prickly pear cactus care involves several steps that are given below. Fertilizer From spring to fall, fertilize every month with a liquid 5-10-10 fertilizer to promote flowering and fruiting. For the young plant, fertilize with 10-10-10 fertilizer. Do not feed in winter in cooler zones when plant stops to grow. Pruning Pruning is done in spring or late summer by removing the pads that come into contact with each other or those that are damaged or poorly formed. Overwintering Prickly pear cactus care in winter is essential. If you’re growing prickly pear cactus in a pot, protect it in winter by keeping it indoors. If growing outside, do mulching to insulate the plant from temperature drop. Fruit thinning Fruit thinning is done to get a better harvest. It is necessary to remove extra fruits and flowers to get lower production but of improved quality. It is recommended that thinning must be done two weeks before the formation of the fruits, leaving approximately up to 10 fruits per stalk. Pests and Diseases Mealybugs, spider mites, and cochineal might attack it. It is also attacked by fruit flies and moths. Too much water or cold causes rotting. As soon as you detect the softening of tissues, remove the rotten part and treat the infected part with fungicide. Harvesting
0
0
文章
Hande Salcan
2017年05月22日
Hande Salcan
Juiciest and largest fruit from citrus family learn how to grow pomelo. Growing pomelo is not so difficult if you follow the directions given below.
Family– Rutaceae Genus– Citrus Other names– Citrus maxima, shaddock, pomelo, pummelo, pommelo, pamplemousse, or shaddok) jeruk besar, jeruk bali, jambua, limau betawi, limau bali, muli, som-o, ma-o, shouk-ton-oh, suha, lukban, kabugaw and buongon. USDA Zones — 9 to 11 Propagation — Seed, Rootstock Difficulty — Easy Bloom Color — White Height — 15 feet to 40 feet About Pomelo Pomelo or Pummelo is largest fruit of citrus family having up to 10 inches fruits, which are sweet and tart in taste with easily removable orange like thick pale yellow skin. Growing condition for Pomelo As pomelo is a subtropical evergreen tree, it grows best in warm and humid climate. It does not like cold. If you’re growing pomelo in cold weather grow it in a pot. RequirementsSun Like all citrus varieties, pomelo needs full sun to produce its large juicy fruits. It can also be grown in partial sun, but it will produce less fruits. Soil Pomelo can be grown in many types of soil, however in grows best in medium textured soil of pH around 5.5 to 7. *Soil must be well draining to prevent root rot. Watering Pomelo likes moist soil. If grown on ground it should be watered at least once a week. Watering should be consistent and deep. Over-watering, under-watering or inconsistent watering can lead to blossom drop and fruit drop. CareFertilizer Feed with citrus fertilizer according to the product instruction given on the packet. Harvest Like most citrus fruits, pomelo may appear fully ripe weeks before it is actually ripe. The best method to check if the fruit is ripe is to taste it. Pests and diseases
0
0
文章
Hande Salcan
2017年05月22日
Hande Salcan
Learn how to grow calamansi in this guide. Growing calamansi is rewarding. Its exotic citrus like fragrance and mix of tangy, sweet flavor of lime and tangerine of its fruit makes it a worth fruit tree.
USDA Hardiness Zones — 9 – 11, *can be grown in containers in cooler zones Difficulty — Moderate Other Names — calamonding, calamondin orange, calamansi, calamandarin, golden lime, kalamunding, kalamansi, Philippine lime, Panama orange, Chinese orange, musk orange and acid orange. Family — Rutaceae Genus —  Citrofortunella Temperature— 60 – 90 F is optimum growing temperature Propagation Method — Seeds, cuttings About Calamansi Calamansi is a tropical fruit of citrus variety, sized between orange and lime. This small fruit tree grows mostly in South East Asia. It is mostly grown for ornamental purposes in other parts of the world. Calamansi bears smaller fruits than orange which are sour, a little bit sweeter and juicy in taste. Growing Condition Calamansi tree grows in warm tropical and subtropical climate. The growing conditions are similar to that of other citrus trees. Requirements for Growing CalamansiSun Growing calamansi in full sun is required for healthy growth. Proper exposure to sun and temperature improves productivity. Soil Calamansi grows well in dry soil that doesn’t retain moisture and remains waterlogged. Watering Water deeply but only when the top layer of soil dries out, calamansi plant doesn’t like wet feet. How to Plant Calamansi If your climate is frost free and remains warm throughout the year, plant it outside. If you live below USDA Zone 9b, it is better to plant it in a container. Calamnsi CareFertilizer Fertilize your calamansi plant every other month during the growing period with liquid fertilizer that is rich in nitrogen and potassium. Harvest It starts to bear fruits after two-three years of growing calamansi plant and produce them throughout the year intermittently (*in tropics). You can either harvest them young when the color of peel looks variegated pale green or wait until they fully ripen and resemble orange like color. Pests and Diseases
0
0
文章
Hande Salcan
2017年03月15日
Hande Salcan

Fragrant plants are really important in the garden, because they appeal to more than one of our senses. Studies show that the sense of smell can be one of the most important in our life memories. Can you smell a turkey roasting and not think of happy holidays gone by? Or sweet vanilla and perhaps you think of learning to bake cookies as a child? Garden fragrance can be just as powerful. I know that I can’t smell honeysuckle without remembering a wonderful vacation spent by the Russian River in northern California… walking along stony lanes filled with it with my kids when they were small… So plant some fragrant flowers in your garden, near your patio where you read, or by a garden path for you to brush by. Or create memories for your children and plant a hedge of lilacs near their play area. Here are TGG’s fav fragrant flowers that flourish in most gardens, and how to grow them! English Rose – English, or old fashioned roses are among the easiest roses to grow. Disease resistant and fragrant, they have casually shaped flowers and shrub form to 6 feet. Our pick is “Gertrude Jekyll”, a pink variety that is hardy to zone 5. It even tolerates some shade.
  Lilac – Lilacs are my favorite flower ever. I once had one large shrub that filled my home with full and fragrant bouquets every spring, and I can still smell them. They come in both purple and white varieties, and love the sun. There are dwarf varieties available, and ones that grow to 20 feet. Hardy to zone 2, be aware some of the newer bi-colored varieties such as “Sensation” are not as fragrant, but still smell beautiful! There is NOTHING like an ol’ fashioned lilac bush!

  Dianthus – Many varieties of this low growing favorite are highly fragrant. Hardy to zone 3, Dianthus are sun lovers that bloom in spring and early summer. They love well drained soil, and will be short lived in heavy soils that don’t drain well.  Shear after flowering for repeat bloom.
  Daphne – Daphne is a shrub that fills a yard with fragrance each spring. Our pick is “Carol Mackie” for its bi-colored leaves, but the best part is the pink, highly fragrant flowers. Hardy to zone 4, they will tolerate some shade, as they like their roots cool. Mulch in the sun. Grows to 3 feet.
  Peony – Many peonies are fragrant, and gorgeous too! “Gardenia” is one of the most fragrant varieties. Want to learn more about peonies? Read our perfect peonies post.
  Hyacinths – Hyacinths are a spring bulb that must be planted in the fall. Highly fragrant, they are often forced as winter indoor plants and gifts. Purples, pinks and whites.
  Lavender – Lavender is easy to grow, drought resistant, and both the flowers and leaves are fragrant. When I go out into my garden, often I will pick a sprig of lavender to carry around and inhale the scent… its an immediate pick me up! Find out how to grow lavender.
  Lastly, I can’t leave out my memory maker, Honeysuckle! Honeysuckle is the only vine on our list, and will quickly cover a fence or small building. In pink, yellow and red varieties, some types can be invasive in some areas, including Japanese Honeysuckles, which also happen to be one of my favs. (Halls Honeysuckle is a more restrained Japanese variety in soft yellow). Preferring well drained soil, they bloom in summer and are loved by butterflies and hummingbirds. Thrives to zone 4.
1
0
文章
Hande Salcan
2017年03月15日
Hande Salcan
If you need to lay a new lawn, or repair or replace an old one, there is no faster way to get it established then laying sod. It’s not a difficult job if you follow some easy hints. Steve and I have both laid sod before, and we have a step by step guide for you and one big “got to know”. You will be sore. Accept it now…but it will be from a job well done, and nothing…I mean nothing transforms a yard faster then the velvet green of a sod lawn. Why lay sod instead of seed? First of all, a seeded lawn can take months before it can be used for any kind of regular traffic, be that from pets, kids, or guests. Second, it requires the same prep time, yet weeks and weeks more extra maintenance chores while you baby that seed into germination and to become a full and lush lawn. Third, seed lawns tend to need patching later on, and use a lot more water to establish. (I guess thats fourth, too!) Need anymore? It’s pretty darn satisfying spending a good afternoon laying down sod, to step back and look at your instant happy garden. Also, sod can be laid pretty much anytime during the growing season, though spring and fall are best. (Summer installation requires more attention to watering!)  Seed is best planted in spring,  fall planting can be tough.The only con to laying sod (besides the “sore” part is that it initially costs more than seed. But if you factor in the extra water required to get a seed lawn started, the extra expense patching the lawn later on, and the time spent waiting to use your yard, sod is a pretty good investment. Sod can be ordered straight from sod companies, or from your local nursery. It is delivered in 3-4 foot rolls on wood pallets, and is sold by the foot. You will need to figure our how many square feet you want to lay before you call to order.
Ok, so on to our step by step tutorial on how to lay sod! 1. Prep is everything. Just like any gardening, prepping the soil will make the difference between a lawn that is healthy and lush, and one that is thin, dries out easily and eventually fails. The weekend before you have the sod delivered, rent or borrow a rototiller and till the soil six inches deep. Add an inch or two layer of compost to the top of the soil and till it in. Then the fun part. Using a metal rake, smooth out the area to be sodded, and break up any large chunks. Water.
2. Have the sod delivered the morning of installation if possible. If not, no more than the day before. Water the sod on the pallets lightly to keep it from drying out. Hint: Don’t soak the sod, it will make it much heavier to pick up and carry. 3. Lay your first row of sod, usually along the longest side of the yard. Lay the sod strips with the ends butting up together, but not overlapping. This is key to not having weeds growing up between your sod strips while the lawn is establishing.
4. Lay the next row. This row, you want to stagger the seams, as This Old House says, “like you are laying brick.” Lay the rest of your rows in this staggering manner. 5. Use a sharp garden knife to cut strips to fit. My “garden” knife was an old serrated knife from the kitchen drawer. It lasted just long enough to get the whole lawn done. Be warned. 6. When the sod is all laid, walk along the seams to gently help them make contact with the soil. Some rent a roller, but we have never had an issue from just walking the seams. Water well with sprinklers.
7. Water the new lawn every day for a week, then every other day for the next week. By week three, you should be seeing significant growth and you should be able to water like a normal (new) lawn for your climate. When the lawn is 3 inches high, it’s time for the first mowing. It’s also ready for light foot traffic. Sod lawns are pretty tough, you can walk across them to set up a sprinkler, for instance, from day one. Just hold off on the football and slip and slide for a bit, ok? That’s it, you have learned how to lay sod, and transformed your yard! Anyone laid sod before and want to share their tips? Share with us in comments!
0
0
文章
举报 反馈

您有什么意见或建议,欢迎给我们留言。

请输入内容
设置
VIP
退出登录
分享

分享好文,绿手指(GFinger)养花助手见证你的成长。

请前往电脑端操作

请前往电脑端操作

转发
插入话题
提醒好友
发布
/
提交成功 提交失败 最大图片质量 成功 警告 啊哦! 出了点小问题 转发成功 举报 转发 显示更多 _zh 文章 求助 动态 刚刚 回复 邀你一起尬聊! 表情 添加图片 评论 仅支持 .JPG .JPEG .PNG .GIF 图片尺寸不得小于300*300px 最少上传一张图片 请输入内容