关注 2
粉丝 6
Abigal
加拿大 多伦多
+
关注
已关注
+
关注
花园里是空的哦~
还没有添加花。
动态 (112)
Abigal
2017年02月23日
Fall is the time of the year when birds become very active in the #garden . I love birds in my yard, and we here have feeders and bird baths that we keep active all year round to attract the little guys. Oh, and they are great garden decor as well!

When it comes down to it, a bird bath is just a shallow container that holds water sat onto a base. So there are more ways to build a bird bath than ways a three year old can ask “why?”! Before you build your bird bath, keep these tips in mind: Clean your bird bath every few days, even in the winter. In cold areas, a heated bird bath will bring all the neighborhood birds right to your birdie hot tub.(Check Amazon) Place your bird bath where predators such as cats and dogs can’t hide in waiting. So try these creative DIY bird bath ideas and keep your feathered friends coming back all year long! One of our favorites from our friends over at ‘The Art Of Doing Stuff’. This project is simple and uses just a candle plate from Ikea and 3 dowels or old broom handles. Check out the tutorial here. We were also thinking that doing this project with copper pipe instead of the dowels would be cool… especially as the verdigris takes over with age! This #DIY bird bath is simply an old candlestick, a pretty plate and some Gorilla Glue! Great re-purposed bird bath! If the candlestick is hollow (or you can drill out the bottom) insert a stake into the ground, then slip the candlestick over the stake to give it more stability. If it’s a heavy metal candlestick, you have it made!

This would be a pretty choice for a cottage style or Victorian flavor in a garden… and of course, you can choose the glassware to determine the type of style… A quick trip to the thrift store (or your cabinets!) and more Gorilla Glue or construction adhesive. Make sure you stack your “column” before gluing to make sure the combination of glassware you choose is stable. Make changes accordingly. Take a cell phone pic so you can remember how to reassemble with the glue!
Love this colorful diy bird bath from ‘In Lieu Of Preschool’. They did such a great job and even got the kids involved.
Bird Bath Fountain – Can do this without the fountain of course!

Update: We came across this one from ‘Funky Junk Interiors‘. It’s so cute and simple that we had to add it. Have an old metal garbage can lid (with no holes)? Flip it over, and add water. Your done!
When it comes down to it, a bird bath is just a shallow container that holds water sat onto a base. So there are more ways to build a bird bath than ways a three year old can ask “why?”! Before you build your bird bath, keep these tips in mind: Clean your bird bath every few days, even in the winter. In cold areas, a heated bird bath will bring all the neighborhood birds right to your birdie hot tub.(Check Amazon) Place your bird bath where predators such as cats and dogs can’t hide in waiting. So try these creative DIY bird bath ideas and keep your feathered friends coming back all year long! One of our favorites from our friends over at ‘The Art Of Doing Stuff’. This project is simple and uses just a candle plate from Ikea and 3 dowels or old broom handles. Check out the tutorial here. We were also thinking that doing this project with copper pipe instead of the dowels would be cool… especially as the verdigris takes over with age! This #DIY bird bath is simply an old candlestick, a pretty plate and some Gorilla Glue! Great re-purposed bird bath! If the candlestick is hollow (or you can drill out the bottom) insert a stake into the ground, then slip the candlestick over the stake to give it more stability. If it’s a heavy metal candlestick, you have it made!
This would be a pretty choice for a cottage style or Victorian flavor in a garden… and of course, you can choose the glassware to determine the type of style… A quick trip to the thrift store (or your cabinets!) and more Gorilla Glue or construction adhesive. Make sure you stack your “column” before gluing to make sure the combination of glassware you choose is stable. Make changes accordingly. Take a cell phone pic so you can remember how to reassemble with the glue!
Love this colorful diy bird bath from ‘In Lieu Of Preschool’. They did such a great job and even got the kids involved.
Bird Bath Fountain – Can do this without the fountain of course!
Update: We came across this one from ‘Funky Junk Interiors‘. It’s so cute and simple that we had to add it. Have an old metal garbage can lid (with no holes)? Flip it over, and add water. Your done!
文章
Abigal
2017年02月22日
We have some of our favorite #DIY garden projects that we have found around the web. Enjoy these great ideas from our favorite blogs!

I LOVE the pot wreath from ‘Bees Knees Bungalow’! Filled with herbs for fall, or violas for spring?… Read for the full tutorial… this is a budget project too!
Want a cool fire pit for your back patio? This one has a modern vibe that we love, and would update any #garden décor. It’s smooth lines go well with nature. Full tutorial here from ‘Man Made DIY’.
From ‘Tatortots & Jello’. Stamped silverware as garden markers! What a great idea! Check out thrift stores near you for flatware. Here’s the tutorial I love this idea for a garden pond! If you don’t relish digging a hole and laying down liner (which can leak eventually, BTW…) this is the water garden for you. Check out the tutorial here courtesy of ‘Pam Penick’.
This last one is pretty cool…all I’m gonna say is fall leaves.
Thats it! Tgg’s fav five for the week… Love those DIY garden projects!
文章
Abigal
2017年02月22日
I love stone! Just do. So many of you loved our post “Got Stones?” that we are doing a #follow up with more great ideas for easy projects with stones and rocks. All of these are beginner projects, are simple, inexpensive, and creative…and best of all, you may have the stones right in your back yard!

Stick and Stones Use bundles of branches or sticks to create a garden post, then top with decorative rocks from your #garden . Love this!
Gabions A gabion is a box or container made of wire mesh or fencing, and filled with a material for stability. In this case, wire mesh is used to create a tall box, filled with rock, then used as a decorative column. You can create tables, benches, even retaining walls with this method. Its a trendy and modern way to re-purpose in the garden, and its so creative!
Spiral Garden Use rocks and your fav plants to create a spiral garden.
Create a Mural Got an ugly fence or wall that could use an artistic touch? Use rocks and stones and a construction adhesive from the home improvement store to create simple murals. This community garden has it right!
And just because it’s fun, here are some more inspirational photos with stone and rock!
文章
Abigal
2017年02月22日
Garden furniture can be one of the most expensive (and boring) parts of a backyard design. It’s not an easy task to find interesting #garden pieces that fit into your budget. It is easy however, to build these great #DIY garden furniture pieces to add a unique element to your yard. Did we also mention you will be up-cycling, on a budget? Win win!

Cinder Block & Wood – One Hour Bench Try this tutorial from Kayla’s Basement, our featured image above! This is an easy and fast bench to create for any outdoor #space and nice because it is easily adjusted to fit different size cushions.
Yard Sale Chair Garden Bench: This is a great touch to any garden, and you can use any style depending on the style of chairs you choose. This is the toughest of our five projects, so if it isn’t in your skill range, we have more! This one takes a little cutting of lumber, but still a pretty easy project for anyone willing to get their hands dirty. If you look at the bench, you will see how the basic assembly process goes, but here’s a quick step by step. Face two wooden chairs next to each other. Using lumber from the home improvement yard, or better yet, recycle wood pallet slats, connect the chairs on both sides along the seat base. Don’t make these side pieces too long as you want the bench to be stable. Now measure the length from the back of one seat, to the back of the other. Cut and attach lumber over the seat to create a new bench seat. Now add lumber pieces for the “back” of the bench. Paint and seal, and enjoy!
Up-Cycled Cement Block Bench: This one from BHG is a bit easier for the average DIY’er. Simply stack cinder or cement blocks (Can you get recycled ones from your local Habitat for Humanity Store?). Add a pad to the top of the bench for comfort. You can create one by covering a piece of foam from the craft store with fabric, or try finding a “last of it’s kind” garden cushion on clearance (or thrift store!) and lay it flat. Even scattered throw pillows!
Small Log Table: If you have a wood pile, or access to a cut down tree, all this takes is cutting an armful of logs to the same length. Secure tightly with two straps. Done!
DIY Garden Tree Trunk Dining Table LOVE this table! The biggest issue with this table is making sure the stump top is level. This can be pretty difficult but if you have access to a chain saw, this is a good bet. For the rest of us, we will be screwing scrap wood shims to the surface until we can create a level surface to secure a wood table top to.
Wood Tree Trunk Garden Stools (Or Ottomans!) This tutorial from Shelterness is a cute idea for making easy garden stools from tree trunks. Great for kids or for putting your feet up! Easy!
Unique DIY garden furniture, for the cost of some up-cycled materials and a little elbow grease. Which one would you most like to try?
文章
Abigal
2017年02月22日
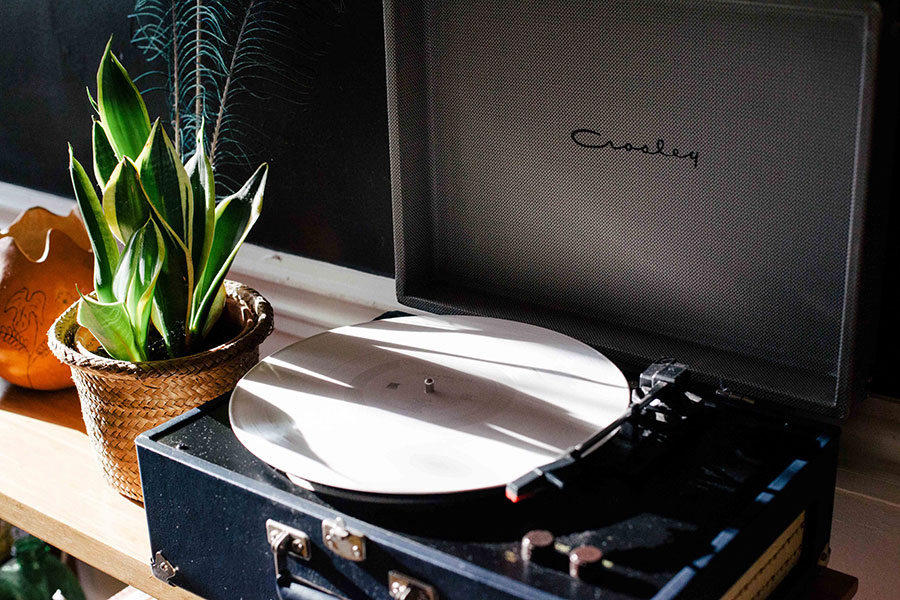
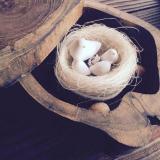
No matter what time of year it is, there are times when we want to bring the beauty and gifts from the #garden indoors. Whether it’s to keep your “green thumb” warm during the winter months, because you live in a space with no outdoor gardening spot, or just because you love to have #plants indoors as well as out, here are some easy indoor gardening projects to keep you busy when you aren’t outdoors!

From ‘The Kitchn’, learn how to plant succulents in eggshells! Our feature project, above and below – This is a really organic project great for a kitchen, and especially for someone who loves to cook. Could you do the same thing with sprouts?
‘Holiday Sparkle’ shows us how to grow green onions indoors. These are great because the more you cut them, the more they grow!
Heres a project for more onions for a bigger household… make this vertical onion planter from a pop bottle! From ‘Auntie Dogmas Garden Spot‘…
From ‘Remove and Replace’, learn how to regrow romaine lettuce from that salad stump… Grow it once, never again!
‘Parents.com’ shows us how to plant an odds and ends garden, this with leftover celery. Kids love this kind of thing, fun family project.
Last, learn to grow a lemon tree indoors! From ‘The Kitchn’, this is a good tutorial on how to grow lemons indoors, and also some information on where, and what type, to buy! Find even more information on growing lemons from ‘Jim Hofman‘.
So no matter what your reason for keeping it indoors, here are a couple of projects to bring the garden to the window sill!
文章
Abigal
2017年02月22日
In the late summer and fall, as the sun sets earlier but the gorgeous weather still keeps us #outdoors , the need for cool #garden lighting arises. No one wants to run out and install a lighting system just because sunset comes a little sooner! We have five great #DIY garden lighting ideas that are easy enough for any beginner, and can be done in time for your weekend BBQ! Check out these lighting projects anyone can do!

Paint Cans Luminaries are an easy DIY lighting project, and can be done with everything form recycled kitchen aluminum cans, to empty paint cans you can pick up at the home improvement store. There are two methods… Trace a design on the outside of the can with pencil, or a use a stencil. You can use a drill to drill holes into the can following the pattern. This is best for larger cans. For smaller cans, fill with water and freeze. Now while still frozen, use a hammer and nail to punch the pattern into the can. Allow cans to melt, (in a sink or outdoors!) empty and dry. Paint with spray paint of your choice, pop in a candle, and there you go!
Pot Rack Chandelier This one is a pretty easy one if you have an overhead structure or tree. Simply hang an old pot rack (Or an old iron grate, sled, or even a small pallet) from chains and sturdy hooks. Place a variety of potted plants and candles onto the rack. Light the candles. Enjoy a wonderful, or even romantic evening!
Recycled Torches Love these garden torches by In My Own Style! They have a great tutorial but short version is that this is a budget friendly lighting project that is way cool, and recycles too! Think about painting them in brights or metallics…

Globe String Lights Have you noticed those fancy string lights in the stores (even Target) can run $25 for one string? Pick up raffia balls at the dollar store, then string through white holiday lights. Done, for less than a couple bucks!

Glowing Orbs Finally, from The Art of Doing Stuff is this tutorial on glowing orbs, made for less than $3! Simply find old glass globes from the thrift store (We have a project coming up at TGG that utilizes these, so stock up!) and holiday lights! Love this!

Summer isn’t over ’til it’s over folks! Create a space for your family to spill over into the outdoors well into fall with these easy garden DIY projects.
Paint Cans Luminaries are an easy DIY lighting project, and can be done with everything form recycled kitchen aluminum cans, to empty paint cans you can pick up at the home improvement store. There are two methods… Trace a design on the outside of the can with pencil, or a use a stencil. You can use a drill to drill holes into the can following the pattern. This is best for larger cans. For smaller cans, fill with water and freeze. Now while still frozen, use a hammer and nail to punch the pattern into the can. Allow cans to melt, (in a sink or outdoors!) empty and dry. Paint with spray paint of your choice, pop in a candle, and there you go!
Pot Rack Chandelier This one is a pretty easy one if you have an overhead structure or tree. Simply hang an old pot rack (Or an old iron grate, sled, or even a small pallet) from chains and sturdy hooks. Place a variety of potted plants and candles onto the rack. Light the candles. Enjoy a wonderful, or even romantic evening!
Recycled Torches Love these garden torches by In My Own Style! They have a great tutorial but short version is that this is a budget friendly lighting project that is way cool, and recycles too! Think about painting them in brights or metallics…
Globe String Lights Have you noticed those fancy string lights in the stores (even Target) can run $25 for one string? Pick up raffia balls at the dollar store, then string through white holiday lights. Done, for less than a couple bucks!
Glowing Orbs Finally, from The Art of Doing Stuff is this tutorial on glowing orbs, made for less than $3! Simply find old glass globes from the thrift store (We have a project coming up at TGG that utilizes these, so stock up!) and holiday lights! Love this!
Summer isn’t over ’til it’s over folks! Create a space for your family to spill over into the outdoors well into fall with these easy garden DIY projects.
文章
Abigal
2017年02月22日
I have a secret. I used to hate succulents. With a passion. I think I was influenced #growing up in the ’70’s in California, where succulents were usually half dead hen and chicks filling a yard people thought was “no maintenance”… So when succulents began to gain a resurgence in popularity, I scoffed. Until I opened my eyes and saw the truth. The truth is that succulents and sedums are gorgeously colored, textural, easy to grow and offer an amazing amount of variety. These are not my childhood hen and chicks! I’m still trying to sell Steve on the succulents, though I think he’s seeing the light… (He’s more of a cactus guy… another area to which my eyes are a little closed… Hey, I’m a work in progress, ok? :)) I’ve come to love sedums so much that half my yard is covered in my fav, Sedum ‘Angelina’ – it is proof that succulents can be lush and green, too! In fact, we used mostly sedums to fill our recent #DIY cinder block planter. (And they are filling in nicely!) So what is my next move? Sedum and succulent planters are the perfect way to showcase these beauties, without them getting lost in the garden. So here are our picks for gorgeous planter projects that should have you all rethinking succulents, and possibly cause you to run, not walk, to the nursery. Did I mention these plants are easy? Come on people, jump on the succulent train! Note: If you want you succulent planter to stay outdoors all year, make sure you buy them from the nursery’s hardy stock, usually kept outside. The succulents you find in the greenhouse are not hardy, but can be used outdoors in the summer and brought inside for winter. They make great houseplants too!

Talk about simple… this succulent planter from ‘BHG‘ is simply pvc pipe cut into rounds, tucked in to a tray filled with stones, and planters with succulent starts. (Starts are tiny new plants, usually less expensive, too.)
This DIY vertical brick succulent planter is in the book ‘Design Sponge at Home’. Need to get my hands on a copy and find out exactly how they did it! Anyone have a copy and want to share the basics?
These are various succulents planted in a trunk. Cute! Keep in mind, succulents need excellent drainage, so make sure there is a good layer of rocks in the bottom of any container that does not drain well, and use soil mixed with sand.
From ‘Gardenista‘, by Lila B. Design, this succulent log planter is beautiful and natural… And would have good drainage for these plants. An easy DIY project! (Ok, simple, maybe not easy! That’s a lot of plants!) Baylor Chapman is the owner of Lila B. Design, and has a book out I’m dying to get my hands on, called ‘The Plant Recipe Book’. Their motto is “we make beautiful statements with living things”… Wow, do they ever! Wish I still lived in the Bay Area, just to go visit that shop!
Another project from “Lila B.’… this succulent planter from window shutters is a perfect example of using starts, tucked into the slats of the shutters. You can create your own small plants from many succulents just by breaking off a piece. Most will root easily.
‘Sunset Magazine’ shows us how to make our own living art from succulents. Be sure to check out all the steps, it shows variations and different parts of the project.

From ‘Ciao! Newport Beach‘, one of their readers created this succulent garden with a beach theme. Don’t be afraid to add other elements to your succulent container to give it the right feel for your garden.
This photo was taken by Sue Brown at ‘Cottage Gardens Nursery’ in Petaluma, California. Using an old water fountain gives this container garden real character! What other types of upcycled containers would work well?
Another idea from ‘Sunset’, this water wise succulent garden was planted in an old chicken trough…
From ‘Gardening Gone Wild‘, these succulents pots are grouped together for impact. I like the concrete pots with the sedums…
This last one I had to throw in, just to highlight the beauty of these plants, and their versatility. SG Plants in Castroville, California (I spent time in Castroville as a a kid, great growing area! Artichokes everywhere!) has perfected these succulent vertical planter panels. They use these large scale panels to create garden art. Could a DIY’er do this same thing on a smaller scale? Beautiful and inspiring!
Talk about simple… this succulent planter from ‘BHG‘ is simply pvc pipe cut into rounds, tucked in to a tray filled with stones, and planters with succulent starts. (Starts are tiny new plants, usually less expensive, too.)
This DIY vertical brick succulent planter is in the book ‘Design Sponge at Home’. Need to get my hands on a copy and find out exactly how they did it! Anyone have a copy and want to share the basics?
These are various succulents planted in a trunk. Cute! Keep in mind, succulents need excellent drainage, so make sure there is a good layer of rocks in the bottom of any container that does not drain well, and use soil mixed with sand.
From ‘Gardenista‘, by Lila B. Design, this succulent log planter is beautiful and natural… And would have good drainage for these plants. An easy DIY project! (Ok, simple, maybe not easy! That’s a lot of plants!) Baylor Chapman is the owner of Lila B. Design, and has a book out I’m dying to get my hands on, called ‘The Plant Recipe Book’. Their motto is “we make beautiful statements with living things”… Wow, do they ever! Wish I still lived in the Bay Area, just to go visit that shop!
Another project from “Lila B.’… this succulent planter from window shutters is a perfect example of using starts, tucked into the slats of the shutters. You can create your own small plants from many succulents just by breaking off a piece. Most will root easily.
‘Sunset Magazine’ shows us how to make our own living art from succulents. Be sure to check out all the steps, it shows variations and different parts of the project.
From ‘Ciao! Newport Beach‘, one of their readers created this succulent garden with a beach theme. Don’t be afraid to add other elements to your succulent container to give it the right feel for your garden.
This photo was taken by Sue Brown at ‘Cottage Gardens Nursery’ in Petaluma, California. Using an old water fountain gives this container garden real character! What other types of upcycled containers would work well?
Another idea from ‘Sunset’, this water wise succulent garden was planted in an old chicken trough…
From ‘Gardening Gone Wild‘, these succulents pots are grouped together for impact. I like the concrete pots with the sedums…
This last one I had to throw in, just to highlight the beauty of these plants, and their versatility. SG Plants in Castroville, California (I spent time in Castroville as a a kid, great growing area! Artichokes everywhere!) has perfected these succulent vertical planter panels. They use these large scale panels to create garden art. Could a DIY’er do this same thing on a smaller scale? Beautiful and inspiring!
文章
Abigal
2017年02月21日
Everyone loves the mason jar… it holds a sense of nostalgia and is a versatile #decorating element in any style #garden ! Here are five great ways to turn the inexpensive and easy to find mason jar into great outdoor garden lighting for your yard or patio!
Project One:
Candle Lighting
Fill mason jars one third full with sand, beans or gravel, and nestle a small candle into the sand. Hang from trees and rooftops with heavy twine. Looks best in groups hung at different heights. Great if done over a dining table under the trees!

Project Two: Got an unused clothesline? Hang mason jars randomly along the clothesline with wire. Now string white mini lights along the clothesline, wrapping as you go. When you reach a mason jar, wrap lights down into the jar, then back out again, and continue along the clothesline. Back yard bbq’s will never be the same!
Project Three: Mason Jar Light Cluster Create your own pendant lights with mason jars!
Project Four: Mason Jar Oil Lamps These are pretty easy to make… Poke a hole in the lid of the jar with a nail or drill. Insert a wick through the hole into the bottom of the jar. Fill with non toxic burning oil. I hear even olive oil will burn! Use a fiberglass wick from the craft store for best results, but you could even use a 100% cotton strip of fabric in a pinch. Light, and enjoy!
Project Five: Solar Mason Jar Lantern This #DIY mason jar project is easy, and inexpensive! Simply buy those small inexpensive garden solar lights at the dollar or discount store. Take the top “light and battery” section off of the stake. Place the light into the jar. Make sure the jar is positioned so that the solar panel gets lots of sun during the day.Five easy, inexpensive mason jar outdoor lighting projects anyone can do! Enjoy your outdoors
文章
Abigal
2017年02月21日
I love what a fire pit does for any yard or #garden . It brings family and friends together and makes any garden into a warm, welcoming place to let go of the stress of the day. Plus, let’s be honest, it feels like camping, and who doesn’t love that? Here’s how to build a back yard fire pit step by step, and it doesn’t have to be expensive. A quick trip to the home improvement store, a little hard work and you could be roasting marshmallows tonight!
Supplies
Stone pavers, bricks, cinder blocks or other non flammable building materials
Sand or gravel
Shovel
Rake
Step One:
Decide where you want your fire pit to sit, and what dimensions you would like. Make sure you choose a spot at least 25 feet away from structures or overhanging #trees . An average fire pit is from 36-45 inches across and 12 inches high.
Step Two:
Mark the center of the fire pit, the easiet way is with a stake. Then tie a string half the total diameter you want the finished pit to be. In other words, if your pit will be 36 inches across, make the string 18 inches. Tie the other end of the string to another stake or stick, and pulling the string taut, walk around the stick marking a prefect circle. This is the outline of the fire pit. Or if you choose, use marking spray paint as shown in the photo.

Step Three: Dig out the entire hole a few inches deep. This is to remove any flammable materials under the pit, and also to give space for the non flammable layer. Now start placing the stones around the perimeter of the pit. Stack the stones in a second layer until the stones or bricks are at least 12 inches tall.
Step Four: Fill the fire pit with several inches of sand or gravel to prevent fire embers from burning into the ground. Add another row of stones if necessary to keep the edge of the pit at least 12 inches above the surface of the sand.
That’s it! Pull up some chairs, find some great roasting sticks, and call the neighbors… you have just built a back yard fire pit!
文章
Abigal
2017年02月21日
Many areas of the country use metal fence posts in building back yard fences to provide a strong, long lasting barrier that stands up to wind and sun rot. The only problem with that solution is that they are just, plain, ugly. Here at TGG, we have a great yard and garden, but I couldn’t stand to look out of the window each day at those ugly metal fence posts! So if you have this problem, here is the #DIY cure, step by step! (Did I forget to mention? It’s easy!)

Supplies Wood fence boards, tall enough to cover to the top of your fence posts, and at least as wide. We used 5 ½ foot tall, six inch wide cedar fence boards. Screw Eyes, we used #212 Flexible wire, we used 18 gauge Tape measure or yard stick Pencil
Step One:We are going to be creating a wire loop on the back of the wooden board, to hang over the top of the metal fence post, which will in turn cover the metal post with the wood. I suggest you read through the whole post, and check out the photos, and it will all become clear on how simple it is! Here is an example of what the wire loop will look like when finished, to help you wrap your head around what we’re up to.
Hold your wood board in front of your metal post, and determine how close to the ground you would like it to hang. Make sure it covers the top of the ugly metal fence post. The loop will hang off of the top bracket or fence line. Measure 2 ½ inches below the spot where the wire will hang off of. Might help to have an extra hand to hold the board in place as you mark the measurements.
Step Two:Now lay out all you boards, and assembly line style, mark all your boards at that same measurement, and one inch in on both sides of the board. This is where you will insert the screw eyes. Make sure you don’t screw them so far that you poke thru the front (exposed) side of the fence board.
Step Three:Cut a 15 inch long piece of wire for each board. We used the wire cutter that came on the package of our wire, but you should be able to use scissors with this gauge pretty easily. Slip through one screw hook, bend off about 1 ½ inches and wrap it tight.
Step Four:Hold the board in place, and wrap the wire around the top of the metal post and through the other screw eye. Bend to mark, then remove the board from the post. (This is to make it easier to wind the wire). Insert the free end of the wire back through the screw eye to the bend point you marked, then twist the wire closed. You now have your wire loop.
Step Five:Hang the wire loop over the top of the fence post. You can unwind the wire from one screw eye and tighten it or loosen it if you need to adjust.
Repeat for all fence posts! If your wood boards jut too far above the top of the fence and it bothers you, feel free to trim the boards down. Just be sure to trim them all down to the same height. This likely won’t be a problem for most of us, as fence boards are pretty standard in most parts of the country. Look at the difference!

If you live in a windy or stormy area, you can repeat the process on the lower end of the board as well and secure the bottom in the same way. Great cure for those ugly metal fence posts, and it’s and easy and inexpensive DIY garden project. Our total? 10 cedar fence boards 17.00 3 packs of screw eyes 3.50 1 package 18 gauge wire 3.50 Grand total for our entire fence line, $24.00! What kind of camouflage projects are you facing in your yard or garden? Comment and let us know, maybe it will be in our upcoming posts!
Supplies Wood fence boards, tall enough to cover to the top of your fence posts, and at least as wide. We used 5 ½ foot tall, six inch wide cedar fence boards. Screw Eyes, we used #212 Flexible wire, we used 18 gauge Tape measure or yard stick Pencil
Step One:We are going to be creating a wire loop on the back of the wooden board, to hang over the top of the metal fence post, which will in turn cover the metal post with the wood. I suggest you read through the whole post, and check out the photos, and it will all become clear on how simple it is! Here is an example of what the wire loop will look like when finished, to help you wrap your head around what we’re up to.
Hold your wood board in front of your metal post, and determine how close to the ground you would like it to hang. Make sure it covers the top of the ugly metal fence post. The loop will hang off of the top bracket or fence line. Measure 2 ½ inches below the spot where the wire will hang off of. Might help to have an extra hand to hold the board in place as you mark the measurements.
Step Two:Now lay out all you boards, and assembly line style, mark all your boards at that same measurement, and one inch in on both sides of the board. This is where you will insert the screw eyes. Make sure you don’t screw them so far that you poke thru the front (exposed) side of the fence board.
Step Three:Cut a 15 inch long piece of wire for each board. We used the wire cutter that came on the package of our wire, but you should be able to use scissors with this gauge pretty easily. Slip through one screw hook, bend off about 1 ½ inches and wrap it tight.
Step Four:Hold the board in place, and wrap the wire around the top of the metal post and through the other screw eye. Bend to mark, then remove the board from the post. (This is to make it easier to wind the wire). Insert the free end of the wire back through the screw eye to the bend point you marked, then twist the wire closed. You now have your wire loop.
Step Five:Hang the wire loop over the top of the fence post. You can unwind the wire from one screw eye and tighten it or loosen it if you need to adjust.
Repeat for all fence posts! If your wood boards jut too far above the top of the fence and it bothers you, feel free to trim the boards down. Just be sure to trim them all down to the same height. This likely won’t be a problem for most of us, as fence boards are pretty standard in most parts of the country. Look at the difference!
If you live in a windy or stormy area, you can repeat the process on the lower end of the board as well and secure the bottom in the same way. Great cure for those ugly metal fence posts, and it’s and easy and inexpensive DIY garden project. Our total? 10 cedar fence boards 17.00 3 packs of screw eyes 3.50 1 package 18 gauge wire 3.50 Grand total for our entire fence line, $24.00! What kind of camouflage projects are you facing in your yard or garden? Comment and let us know, maybe it will be in our upcoming posts!
文章

