文章
Dummer. ゛☀
2017年09月20日

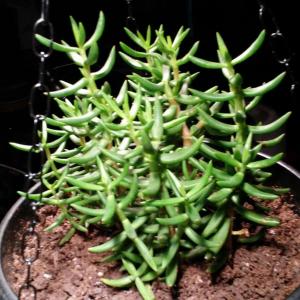
Fenestraria, also know as Baby Toes is a small genus of miniature succulent plants that can be grown indoor or outdoor as small ornamental plants. These tiny plants are characterized by clumps of small, soft and succulent leaves.

Fenestraria comes from arid regions of Namibia and South Africa where they grow and hide themselves in sandy soil in order to retain maximum water in their leaves protect them from harsh sunlight.

When grown as houseplants, they tend to produce large clumps of fleshy and soft leaves that look like pebbles or tiny toes, that is why, they are commonly described as Baby Toes plants.
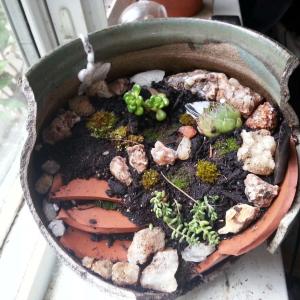
Baby Toes are excellent choice for miniature gardens or as miniature indoor plants. They can be grown in containers as low-maintenance plants.

Either grown indoor or outdoor, Fenestraria loves bright but filtered sunlight in summer and protection from winter frost. The plant requires sandy and well-drained soil with regular dose of general fertilizer. Water only when the soil is completely dry because these plants cannot survive wet conditions.

Fenestraria plant produces white or yellow flowers in winter. Commercially available species are:
F. aurantiaca: Grows as dwarf (2 inches / 5 cm) succulent plant and produces grey-green leaves and yellow flowers.
F. rhopalophylla: Miniature succulent with white flowers and grey-green leaves; grows up to 1.6 inches (4 cm).

Fenestraria comes from arid regions of Namibia and South Africa where they grow and hide themselves in sandy soil in order to retain maximum water in their leaves protect them from harsh sunlight.

When grown as houseplants, they tend to produce large clumps of fleshy and soft leaves that look like pebbles or tiny toes, that is why, they are commonly described as Baby Toes plants.
Baby Toes are excellent choice for miniature gardens or as miniature indoor plants. They can be grown in containers as low-maintenance plants.

Either grown indoor or outdoor, Fenestraria loves bright but filtered sunlight in summer and protection from winter frost. The plant requires sandy and well-drained soil with regular dose of general fertilizer. Water only when the soil is completely dry because these plants cannot survive wet conditions.

Fenestraria plant produces white or yellow flowers in winter. Commercially available species are:
F. aurantiaca: Grows as dwarf (2 inches / 5 cm) succulent plant and produces grey-green leaves and yellow flowers.
F. rhopalophylla: Miniature succulent with white flowers and grey-green leaves; grows up to 1.6 inches (4 cm).
0
1
文章
Dummer. ゛☀
2017年09月20日

Conophytum are a group of miniature succulents prized by enthusiasts for their wide variety of forms, textures, and colors. Typically, they form clusters or grow in mats but some species are solitary. Bodies can be conical, oblong, or cylindrical, spotted or lined, velvety, warty, or windowed, and range in color from various shades of green and blue-green to brown and red. Some species are mistaken for Lithops. Anatomically, they are distinguished by conically united leaves and by their petals, which are fused into a basal tube, unlike most mesembs. Most conos flower in the autumn and display a rainbow range of colors. They can be divided into night-blooming, twilight-blooming, and day-blooming species. The flowers of some species are also scented.

Growing Conditions
Light: The Conophytum require a very bright environment and even a few hours of full sun, in cooler moments of the day to avoid sunburn. At the end of the dormant season the plants must gradually accustomed to the increase of brightness.
Water: After they bloom in October/November mist every other week. When active growth resumes in late spring water about once per week until summer. Plants may go dormant in heat, water no more than every three weeks. During active growth, if leaves start to retract into soil or wrinkle, it needs watering.
Soil: The types of soil suitable to this genus are various and different for each species because of the great diversity of different specimens; the common feature is, however, the high drainage capacity and good porosity.
Fertilizer: Light feeders, may not need fertilizer for three years after potting or at all if you repot every two years. Fertilize at the beginning of the growth period and just before flowering.

General Care
Conophytums are usually grown in dish gardens where they spread slowly but make good ornamental plants for window gardening. They also do well in rockeries where they can be grown in crevices.
The Conophytum vegetate during the winter season. They must then be kept dry during hot, gradually wet upon autumn arrival: the moisture stimulate the release of new root hairs and the plant will grow for the entire winter season, foliar issuing new pairs from inside the existing ones. Flowering usually occurs in autumn and the color of the flowers is extremely variable from species to species. The cultivation is quite easy, but care must be taken to avoid excess water and to prevent rot: the plants themselves communicate their water needings with a slight wrinkling of the epidermis. They do not particularly fear the cold weather and can resist also at temperatures of 23°F (-5°C), as long as the soil is completely dry and the temperature returns rapidly to rise.

Propagation
Propagation can be made from seed or by cuttings: seed germination is quite easy (see the germination rate of our seeds), but the young seedlings are very sensitive to humidity and need a special and constant care and constant to raise them correctly.

Growing Conditions
Light: The Conophytum require a very bright environment and even a few hours of full sun, in cooler moments of the day to avoid sunburn. At the end of the dormant season the plants must gradually accustomed to the increase of brightness.
Water: After they bloom in October/November mist every other week. When active growth resumes in late spring water about once per week until summer. Plants may go dormant in heat, water no more than every three weeks. During active growth, if leaves start to retract into soil or wrinkle, it needs watering.
Soil: The types of soil suitable to this genus are various and different for each species because of the great diversity of different specimens; the common feature is, however, the high drainage capacity and good porosity.
Fertilizer: Light feeders, may not need fertilizer for three years after potting or at all if you repot every two years. Fertilize at the beginning of the growth period and just before flowering.

General Care
Conophytums are usually grown in dish gardens where they spread slowly but make good ornamental plants for window gardening. They also do well in rockeries where they can be grown in crevices.
The Conophytum vegetate during the winter season. They must then be kept dry during hot, gradually wet upon autumn arrival: the moisture stimulate the release of new root hairs and the plant will grow for the entire winter season, foliar issuing new pairs from inside the existing ones. Flowering usually occurs in autumn and the color of the flowers is extremely variable from species to species. The cultivation is quite easy, but care must be taken to avoid excess water and to prevent rot: the plants themselves communicate their water needings with a slight wrinkling of the epidermis. They do not particularly fear the cold weather and can resist also at temperatures of 23°F (-5°C), as long as the soil is completely dry and the temperature returns rapidly to rise.

Propagation
Propagation can be made from seed or by cuttings: seed germination is quite easy (see the germination rate of our seeds), but the young seedlings are very sensitive to humidity and need a special and constant care and constant to raise them correctly.
0
0
文章
Dummer. ゛☀
2017年09月02日

Small palm trees are an excellent and versatile addition to a yard. Miniature palm trees are generally defined as being under 20 feet tall, which in terms of palms is really quite short. Within this category there are two types of palm trees: small tree and bushy. Each has its own uses and comes in many varieties. Read on to learn more about these types of palm trees.
Low Growing Palm Trees
Small palm trees that grow up from a single trunk are excellent for front yard garden beds because they have such small root balls. You can plant small palm trees close to your house and avoid the damage to your foundation another tree’s roots might cause, while adding an interesting extra level of height to your landscape.
So what are some short height palm trees? The following palms all reach heights under 12 feet at maturity:
Pygmy Date Palm
Bottle Palm Sago Palm
Spindle Palm
Parlor Palm
Palms that grow between 15 and 25 feet include:
Christmas Palm
Pindo or Jelly Palm
Florida Thatch Palm
Bushy Types of Palm Trees
Many palm trees feature underground trunks or low-to-the-ground clustering branches that give them the appearance of a bush and make them excellent ground cover or property dividers. The Serenoa repens palm has a trunk that grows horizontally with dense leaves that give it a bush-like appearance. It usually reaches heights of 6 feet. The Sabal minor grows in the same way but gets no taller than 5 feet. The Chinese needle and dwarf palmetto are both short, slow-growing groundcover palms with fanning leaves.
Coontie palms reach only 3-5 feet in height and take on the appearance of small, manageable bushes. The Cardboard Palm is a close relative with many small, broad leaves and a nearly unnoticeable trunk. Now that you know a little more about low growing palm trees, take advantage of their short features and add one or two to your landscape.

Low Growing Palm Trees
Small palm trees that grow up from a single trunk are excellent for front yard garden beds because they have such small root balls. You can plant small palm trees close to your house and avoid the damage to your foundation another tree’s roots might cause, while adding an interesting extra level of height to your landscape.
So what are some short height palm trees? The following palms all reach heights under 12 feet at maturity:
Pygmy Date Palm
Bottle Palm Sago Palm
Spindle Palm
Parlor Palm

Palms that grow between 15 and 25 feet include:
Christmas Palm
Pindo or Jelly Palm
Florida Thatch Palm

Bushy Types of Palm Trees
Many palm trees feature underground trunks or low-to-the-ground clustering branches that give them the appearance of a bush and make them excellent ground cover or property dividers. The Serenoa repens palm has a trunk that grows horizontally with dense leaves that give it a bush-like appearance. It usually reaches heights of 6 feet. The Sabal minor grows in the same way but gets no taller than 5 feet. The Chinese needle and dwarf palmetto are both short, slow-growing groundcover palms with fanning leaves.

Coontie palms reach only 3-5 feet in height and take on the appearance of small, manageable bushes. The Cardboard Palm is a close relative with many small, broad leaves and a nearly unnoticeable trunk. Now that you know a little more about low growing palm trees, take advantage of their short features and add one or two to your landscape.
0
0
文章
Miss Chen
2017年08月29日

Roses (Rosa spp.) are hardy in U.S. Department of Agriculture plant hardiness zones 4 through 9, depending on the variety. Varieties include climbing or rambling, bush, hybrid and miniature. Some roses bloom on canes produced the previous year and others on the current year's growth. Pruning at the wrong time can lead to poor blossom production or make the plants susceptible to pests diseases and weather damage. Hard-prune hybrid, bush and miniature roses in spring just before they produce leaves, and hard-prune climbing roses right after their blooms fade in summer. About one-third of a rose bush remains after a hard prune. Trimming instead of hard-pruning, however, removes only enough growth to shape the bushes and to encourage new blooms. Trim all kinds of roses throughout the growing season for size control, additional flowering or to remove faded blooms and damaged branches.

Step 1
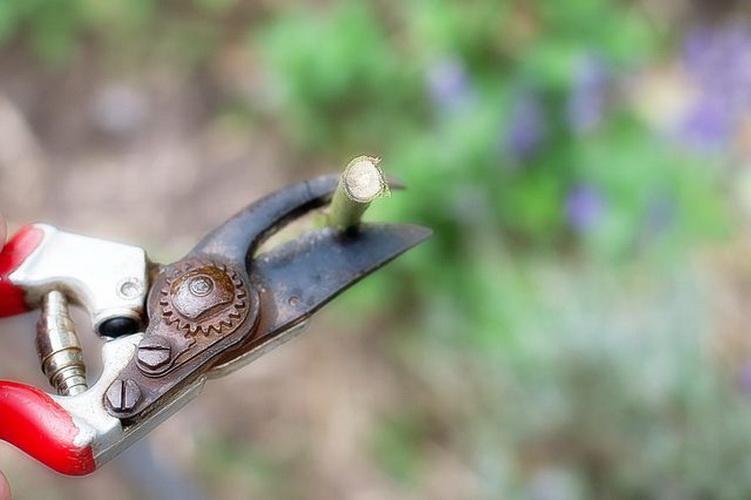
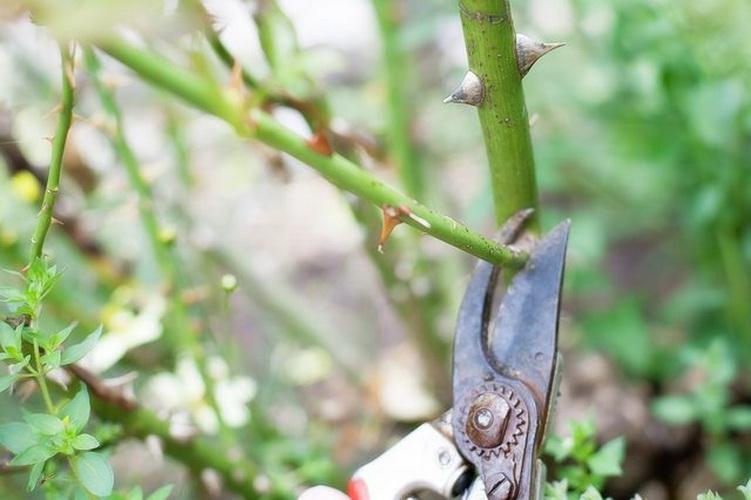
Remove rose bushes' dead canes any time you notice them. Cut back each dead portion of a cane to the green part of the cane, using pruning shears. Check whether or not the pith -- the center of the cane -- is white. If the pith is brown, prune back the cane to its part that has a white pith.
Step 2
Cut away branches that are smaller in diameter than a pencil throughout the growing season. Make each cut at a 45-degree angle away from an outward-facing stem bud.

Step 3
Trim back stems that cross each other or may grow into each other when you notice the problem. Cut such a stem back to the main cane, leaving about 1/4 inch of the stem remaining. Use loppers or pruning shears.
Step 4
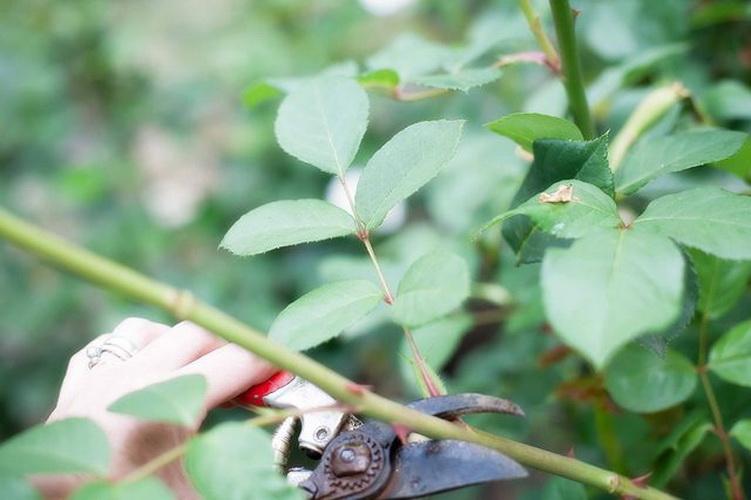
Cut the stem of each spent flower just below the first set of a five-leaf leaflet. Cut just below a seven-leaf leaflet if you want to reduce a rose bush's height. Removing spent flowers is called deadheading.
Step 5
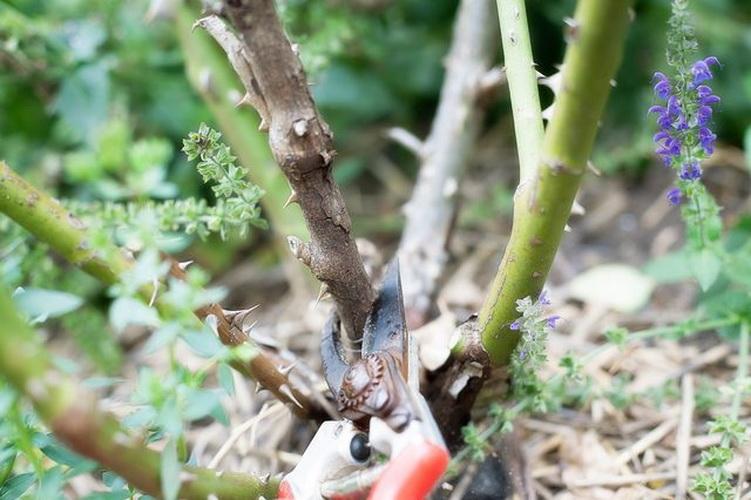
Remove two or three center, old canes at the base of a crowded or overgrown rose bush by using loppers. This technique opens the bush's center, providing it better air circulation during the growing season.


Step 1
Remove rose bushes' dead canes any time you notice them. Cut back each dead portion of a cane to the green part of the cane, using pruning shears. Check whether or not the pith -- the center of the cane -- is white. If the pith is brown, prune back the cane to its part that has a white pith.

Step 2
Cut away branches that are smaller in diameter than a pencil throughout the growing season. Make each cut at a 45-degree angle away from an outward-facing stem bud.

Step 3
Trim back stems that cross each other or may grow into each other when you notice the problem. Cut such a stem back to the main cane, leaving about 1/4 inch of the stem remaining. Use loppers or pruning shears.

Step 4
Cut the stem of each spent flower just below the first set of a five-leaf leaflet. Cut just below a seven-leaf leaflet if you want to reduce a rose bush's height. Removing spent flowers is called deadheading.

Step 5
Remove two or three center, old canes at the base of a crowded or overgrown rose bush by using loppers. This technique opens the bush's center, providing it better air circulation during the growing season.
1
1
文章
Miss Chen
2017年08月29日

Miniature roses may look delicate with their tiny blooms, but they are a surprisingly hardy plant. Although they have been bred specifically to curtail their size, they retain much of the hardiness of rose bushes that tower over them in size. Many can be grown outside year round in zones 6 through 10 and will survive to zone 4 if heavily mulched and protected from winter weather. Their size makes them ideal as houseplants that thrive on sunny windowsills.

Step 1
Plant miniature roses in all-purpose potting soil. Provide adequate drainage by covering the drainage holes with pebbles or broken shards from clay pots.
Step 2
Grow on a sunny windowsill. Some require supplemental lighting. Watch your roses for signs of inadequate light. If the stems stretch leaving bare spaces between leaves, it may be an indication that the rose bush is reaching for more light. A miniature rose should be short and compact with full foliage.
Step 3
Pinch out new growth to encourage the plant to bush out. This creates a full plant with abundant foliage. If the plant still stretches for light, you may need to add supplemental lighting. You can purchase grow lights for plants at your local hardware or garden supply store.

Step 4
Place the pot on a pebble tray. Add water to cover the pebbles. The bottom of the pot should rest above the water level. As the water evaporates, it will provide your miniature rose with the added humidity it desires.
Step 5
Keep the soil moist, but avoid soggy soil. Allow the soil to dry slightly between waterings.
Step 6
Fertilize with a water-soluble fertilizer designed for roses. Mix the solution to quarter-strength and use to water the rose every seven to 10 days from March until November. Allow the plant to rest during the winter months and resume fertilizing in the spring.
Step 7
Deadhead spent blooms to encourage the rose bush to continue blooming. Removing the flowers before they can set seed; this tricks the plant into thinking it has not produced enough blooms.

Step 1
Plant miniature roses in all-purpose potting soil. Provide adequate drainage by covering the drainage holes with pebbles or broken shards from clay pots.
Step 2
Grow on a sunny windowsill. Some require supplemental lighting. Watch your roses for signs of inadequate light. If the stems stretch leaving bare spaces between leaves, it may be an indication that the rose bush is reaching for more light. A miniature rose should be short and compact with full foliage.
Step 3
Pinch out new growth to encourage the plant to bush out. This creates a full plant with abundant foliage. If the plant still stretches for light, you may need to add supplemental lighting. You can purchase grow lights for plants at your local hardware or garden supply store.

Step 4
Place the pot on a pebble tray. Add water to cover the pebbles. The bottom of the pot should rest above the water level. As the water evaporates, it will provide your miniature rose with the added humidity it desires.
Step 5
Keep the soil moist, but avoid soggy soil. Allow the soil to dry slightly between waterings.
Step 6
Fertilize with a water-soluble fertilizer designed for roses. Mix the solution to quarter-strength and use to water the rose every seven to 10 days from March until November. Allow the plant to rest during the winter months and resume fertilizing in the spring.
Step 7
Deadhead spent blooms to encourage the rose bush to continue blooming. Removing the flowers before they can set seed; this tricks the plant into thinking it has not produced enough blooms.
1
1
文章
Dummer. ゛☀
2017年08月21日

Spider plants are very popular and easy to grow houseplants. They’re known best for their spiderettes, little miniature versions of themselves that sprout from long stalks and hang down just like spiders on silk. The interesting spiderettes often overshadow the fact that spider plants bloom, producing delicate white flowers along these stalks. When pollinated, these flowers make seeds that can be harvested and grown into new plants. Keep reading to learn more about how to grow a spider plant from seed.
Harvesting Spider Plant Seeds
Do spider plants have seeds? Yes. Your spider plant should bloom naturally, but it will need to be pollinated in order to produce seeds. You can do this yourself by gently brushing a cotton swab against one flower after the other, or you can simply put your plant outside to allow insects to pollinate it naturally. After the flowers have faded, you should see bumpy green seed pods appear in their place. Harvesting spider plant seeds is easy, and mostly involves waiting. Allow the seed pods to dry on the stalk. Once they’re dry, they should split open naturally and drop their seeds. You can place a piece of paper under the plant to collect the seeds when they fall, or you can break the dry pods off by hand and put them in a paper bag, where they should split open.
How to Grow a Spider Plant from Seed
When growing a spider plant from seed, you should plant the seeds right away, as they don’t store well. Sow the seeds about ½ inch deep in good potting mix and keep them warm and moist. Spider plant seed germination usually takes a couple of weeks, so be patient. Allow your seedlings to grow many true leaves before transplanting them – growing spider plants from seed produces delicate seedlings that don’t like to be moved too soon.

Harvesting Spider Plant Seeds
Do spider plants have seeds? Yes. Your spider plant should bloom naturally, but it will need to be pollinated in order to produce seeds. You can do this yourself by gently brushing a cotton swab against one flower after the other, or you can simply put your plant outside to allow insects to pollinate it naturally. After the flowers have faded, you should see bumpy green seed pods appear in their place. Harvesting spider plant seeds is easy, and mostly involves waiting. Allow the seed pods to dry on the stalk. Once they’re dry, they should split open naturally and drop their seeds. You can place a piece of paper under the plant to collect the seeds when they fall, or you can break the dry pods off by hand and put them in a paper bag, where they should split open.

How to Grow a Spider Plant from Seed
When growing a spider plant from seed, you should plant the seeds right away, as they don’t store well. Sow the seeds about ½ inch deep in good potting mix and keep them warm and moist. Spider plant seed germination usually takes a couple of weeks, so be patient. Allow your seedlings to grow many true leaves before transplanting them – growing spider plants from seed produces delicate seedlings that don’t like to be moved too soon.

0
0
文章
Miss Chen
2017年08月10日

Roses are a traditional and very elegant flower. Rose bushes can be grown from potted plants or cuttings of existing rose bushes.

Features
Roses grow on rose bushes that can range from miniature (one foot tall) to very large (up to five feet tall). They can also be of climbing varieties, with long stems that act like vines. Rose blooms come in a wide variety of colors.
Rooting Rose Cuttings
Rose cuttings are pieces of rose stem that are cut from existing rose plants. An ideal rose cutting is at least 12 inches long. These cuttings can be placed root-side down in jars of water to take root.
Transplanting Rose Cuttings
Once a rose cutting has rooted, that cutting is transplanted to a pot or to the outdoors for growing.

Lifespans
Rose bushes can be kept indoors as potted plants or taken outside and planted in the garden. Healthy rose bushes can last up to 50 years.
Considerations
Roses suffer from exposure to cold and improper pruning techniques. When gardeners are rooting and growing roses, it's important that they consider their region's temperature and water availability to choose the best variety of rose bush.

Features
Roses grow on rose bushes that can range from miniature (one foot tall) to very large (up to five feet tall). They can also be of climbing varieties, with long stems that act like vines. Rose blooms come in a wide variety of colors.
Rooting Rose Cuttings
Rose cuttings are pieces of rose stem that are cut from existing rose plants. An ideal rose cutting is at least 12 inches long. These cuttings can be placed root-side down in jars of water to take root.
Transplanting Rose Cuttings
Once a rose cutting has rooted, that cutting is transplanted to a pot or to the outdoors for growing.

Lifespans
Rose bushes can be kept indoors as potted plants or taken outside and planted in the garden. Healthy rose bushes can last up to 50 years.
Considerations
Roses suffer from exposure to cold and improper pruning techniques. When gardeners are rooting and growing roses, it's important that they consider their region's temperature and water availability to choose the best variety of rose bush.
0
0
文章
Miss Chen
2017年08月10日

Miniature potted roses accent a home's interior with beautiful rose blooms. Caring for mini roses indoors is similar to caring for full-size roses outdoors, only with less work. Indoors, the plant will typically be less prone to pests, and you won't have to worry about weather damage. Less care doesn't mean no care, of course. Keeping certain things in mind will help you maintain your mini roses.

Step 1
Keep your indoor mini roses in a sunny area of your home. The roses will not bloom unless they get enough sunshine.
Step 2
Check the rose's soil for dryness each day. If you stick your finger in the pot and the soil is dry an inch down, you need to water. Water your mini roses deeply so the roots get a good drink--continue until the water starts seeping out of the drainage holes in the bottom of the planter.
Step 3
Cut off old blooms with a sharp knife or pruning shears. Guide to Houseplants.com advises cutting the stem below the bloom at a 45-degree angle. This is a good time to check for insects on the roses. Deal with insects quickly by squishing them or spraying them with pesticide. Most houseplant pesticides will work fine for insects on mini rose plants.

Step 4
Fertilize mini indoor roses with the same fertilizer you use on outdoor roses. Many brands offer fertilizer geared towards roses. Only fertilize the roses when they're in their growing season (spring and summer). You shouldn't have to fertilize indoor potted roses as often as outdoor roses.
Step 5
Prune off dead stems and foliage, cutting the stems at a 45-degree angle. Grow-Roses.com suggests pruning the mini roses back, leaving only 3 inches in height, when the roses are dormant in winter.

Step 1
Keep your indoor mini roses in a sunny area of your home. The roses will not bloom unless they get enough sunshine.
Step 2
Check the rose's soil for dryness each day. If you stick your finger in the pot and the soil is dry an inch down, you need to water. Water your mini roses deeply so the roots get a good drink--continue until the water starts seeping out of the drainage holes in the bottom of the planter.
Step 3
Cut off old blooms with a sharp knife or pruning shears. Guide to Houseplants.com advises cutting the stem below the bloom at a 45-degree angle. This is a good time to check for insects on the roses. Deal with insects quickly by squishing them or spraying them with pesticide. Most houseplant pesticides will work fine for insects on mini rose plants.

Step 4
Fertilize mini indoor roses with the same fertilizer you use on outdoor roses. Many brands offer fertilizer geared towards roses. Only fertilize the roses when they're in their growing season (spring and summer). You shouldn't have to fertilize indoor potted roses as often as outdoor roses.
Step 5
Prune off dead stems and foliage, cutting the stems at a 45-degree angle. Grow-Roses.com suggests pruning the mini roses back, leaving only 3 inches in height, when the roses are dormant in winter.
1
1
文章
Miss Chen
2017年08月08日


Miniature pine tree (Crassula tetragona) is a low-growing succulent shrub resembling a small pine tree, boasting a tree-like habit of bluish green, awl-shaped leaves and spring-blooming white flowers. A popular bonsai, miniature pine tree is often grown as a potted garden plant or houseplant, though it may also be grown directly in the garden where hardy. Aesthetically, miniature pine tree fits in well with rock gardens, bonsai plantings and zen-themed gardens.
Location
A native of South Africa, miniature pine tree is a heat-loving frost-sensitive plant, hardy to about 28 degrees Fahrenheit. It may be grown successfully outdoors in U.S. Department of Agriculture plant hardiness zones 9 to 11, where it will thrive in full sunlight or light shade. Provide indoor plants a winter dormancy period with temperatures around 48 degrees Fahrenheit.
Soil
Like other succulents, miniature pine tree requires very well draining soil. Poorly draining soil, coupled with excessive irrigation, is a surefire recipe for the often fatal fungal disease root rot. A mixture of sand, loam, pea gravel and peat moss with a pH between 6.1 and 7.8 is ideal. Fertilize once during the growing season with a balanced 10-10-10 fertilizer diluted with water to about half strength.

Maintenance
The low maintenance miniature pine tree requires water only once a month or so during the growing season, watering deeply, then allowing the soil to completely dry out before watering again. In the winter, water sparingly, just enough to keep the leaves from shriveling. Miniature pine tree may be propagated by leaf or stem cuttings, rooted in moist, well-draining potting media. The plant may also be divided during the growing season or grown by seed.
Problems
Members of the Crassula genus are prone to mealybugs -- small, cottony insects that form colonies on leaves. If left unchecked, they may stunt plant growth or invite unattractive black sooty mold. The University of California Integrated Pest Management Program recommends removing mealy bugs with a direct stream of water or applying insecticidal soap or narrow-range oil. Avoid excessive use of insecticides in the home garden, which can kill the beneficial insects and parasites that prey on mealybugs.
1
1
文章
Dummer. ゛☀
2017年08月06日

BOTANICAL NAME:
Crassula argentea, Crassula ovata
PLANT TYPE: Houseplant
SUN EXPOSURE: Part Sun
With its thick, woody stems and oval-shaped leaves, jade plants have a miniature tree-like appearance that is very appealing. They live a very long time, often reaching heights of three feet or more when grown indoors.
Though jade plants like the warm, dry conditions found in most homes, they are not as drought tolerant as other succulent species. It’s important to keep the soil moist (but never damp).
PLANTING
Plant in a sturdy container with an all-purpose soil blend. Use a soil that will drain thoroughly, as excessive moisture may promote root rot.
A cactus mix with some organic matter will do. You can also make a mix of one part sterilized organic soil, one part sphagnum peat moss, and three parts coarse sand by volume
Jade plants are known to have very thick stems and may eventually become top-heavy, so plan ahead by planting in a wide and sturdy pot.
CARE
Place jade do need 4 or more hours of sunlight each day; kitchens and offices with a south-facing window are typically great spots with just enough light.
Jade plants grow best at room temperature (65 to 75°F), but prefer slightly cooler temperatures at night and in the winter (55°F).
Keep soil moist but not wet during active growth in the spring and summer. Allow soil to dry between waterings in the winter. Avoid splashing water on the leaves while watering.
If shedding or brown spots occur on the leaves, it is an indication that the plant needs more water.
Jade plants may be fertilized three to four times a year with a standard liquid houseplant fertilizer.
During the winter months, move the plants away from cold windowpanes and out of drafts.
Jade plants do not mind being root-bound. If the plant gets top-heavy and you need to move to a larger pot, transplant when new growth starts. Let the soil dry before repotting and wait four months before fertilizing any repotted plants.
PESTS/DISEASES
Mealybugs may hide under stems and leaves. To remove the bugs, use a spray bottle of water or wipe the insects off gently with a bit of rubbing alcohol on a paper towel or cotton swab.
Powdery mildew is a common problem.
Root rot is due to excessive moisture in the soil.
Leaf drop is a sign of a thirsty plant in need of more frequent watering.
Crassula argentea, Crassula ovata
PLANT TYPE: Houseplant
SUN EXPOSURE: Part Sun
With its thick, woody stems and oval-shaped leaves, jade plants have a miniature tree-like appearance that is very appealing. They live a very long time, often reaching heights of three feet or more when grown indoors.
Though jade plants like the warm, dry conditions found in most homes, they are not as drought tolerant as other succulent species. It’s important to keep the soil moist (but never damp).

PLANTING
Plant in a sturdy container with an all-purpose soil blend. Use a soil that will drain thoroughly, as excessive moisture may promote root rot.
A cactus mix with some organic matter will do. You can also make a mix of one part sterilized organic soil, one part sphagnum peat moss, and three parts coarse sand by volume
Jade plants are known to have very thick stems and may eventually become top-heavy, so plan ahead by planting in a wide and sturdy pot.

CARE
Place jade do need 4 or more hours of sunlight each day; kitchens and offices with a south-facing window are typically great spots with just enough light.
Jade plants grow best at room temperature (65 to 75°F), but prefer slightly cooler temperatures at night and in the winter (55°F).
Keep soil moist but not wet during active growth in the spring and summer. Allow soil to dry between waterings in the winter. Avoid splashing water on the leaves while watering.
If shedding or brown spots occur on the leaves, it is an indication that the plant needs more water.
Jade plants may be fertilized three to four times a year with a standard liquid houseplant fertilizer.
During the winter months, move the plants away from cold windowpanes and out of drafts.
Jade plants do not mind being root-bound. If the plant gets top-heavy and you need to move to a larger pot, transplant when new growth starts. Let the soil dry before repotting and wait four months before fertilizing any repotted plants.

PESTS/DISEASES
Mealybugs may hide under stems and leaves. To remove the bugs, use a spray bottle of water or wipe the insects off gently with a bit of rubbing alcohol on a paper towel or cotton swab.
Powdery mildew is a common problem.
Root rot is due to excessive moisture in the soil.
Leaf drop is a sign of a thirsty plant in need of more frequent watering.
4
3
文章
Dummer. ゛☀
2017年08月06日

BOTANICAL NAME: Rosa
PLANT TYPE: Flower
SOIL TYPE: Loamy
BLOOM TIME: SpringSummerFall
Rose bushes come in a variety of forms, from climbing roses to miniature rose plants, blooming mainly in early summer and fall.. One way to group roses into classes is according to their date of introduction:
Old roses—also called “old-fashioned roses” and “heirloom roses”—are those introduced prior to 1867. These are the lush, invariably fragrant roses found in old masters’ paintings. There are hundreds of old rose varieties—whose hardiness varies—providing choices for both warm and mild climates.
Modern hybrid roses are sturdy, long-blooming, extremely hardy and disease-resistant, and bred for color, shape, size, and fragrance.
Species, or wild, are those that have been growing wild for many thousands of years. These wild roses have been adapted to modern gardens and usually bloom in the spring.
PLANTING
Preparing the Soil
Roses prefer a near-neutral pH range of 5.5–7.0. A pH of 6.5 is just about right for most home gardens (slightly acidic to neutral).
An accurate soil test will tell you where your pH currently stands. Acidic (sour) soil is counteracted by applying finely ground limestone, and alkaline (sweet) soil is treated with ground sulfur.
Before you plant, be sure that you choose varieties proven in your climate. When in doubt, All-America Rose Selections winners are good bets. Or check with your local nursery.
Ordering Plants
If you order roses from a mail-order company, order early, in January or February (March at the latest). They are usually shipped in the spring as bare roots when plants are fully dormant, well before they have leafed out. They’ll look like a bundle of sticks on arrival. Note that they are not dead—simply dormant.
If you are buying container-grown roses (vs. bare-root roses), plant them by May or early June for best results.
Planting Tips
Plant roses where they will receive a minimum of 5 to 6 hours of full sun per day. Roses grown in weak sun may not die at once, but they weaken gradually. Give them plenty of organic matter when planting and don’t crowd them.
Wear sturdy gloves to protect your hands from prickly thorns. Have a hose or bucket of water and all your planting tools nearby. Keep your bare-root rose in water until you are ready to place it in the ground.
Roses can be cut back and moved in either spring or fall, but not in midsummer, as they might suffer and die in the heat. Large rose canes can be cut back by as much as two thirds, and smaller ones to within 6 to 12 inches of the ground.
When you transplant your roses, be sure to dig a much bigger hole than you think you need (for most types, the planting hole should be about 15 to 18 inches wide) and add plenty of organic matter such as compost or aged manure.
Some old-timers recommend placing a 4-inch square of gypsum wallboard and a 16-penny nail in the hole to provide calcium and iron, both appreciated by roses.

CARE
Watering Roses
Diligently water your roses. Soak the entire root zone at least twice a week in dry summer weather. Avoid frequent shallow sprinklings, which won’t reach the deeper roots and may encourage fungus. Roses do best with 90 inches of rain per year, so unless you live in a rain forest, water regularly.
Roses love water—but don’t drown them. That is, they don’t like to sit in water, and they’ll die if the soil is too wet in winter. The ideal soil is rich and loose, with good drainage. One of the worst mistakes you can make is to not provide adequate drainage.
Use mulch. To help conserve water, reduce stress, and encourage healthy growth, apply a 2- to 4-inch layer of chopped and shredded leaves, grass clippings, or shredded bark around the base of your roses. Allow about an inch of space between the mulch and the base stem of the plant.
Feeding Roses
Feed roses on a regular basis before and throughout the blooming cycle (avoid chemical fertilizers and pesticides if you’re harvesting for the kitchen).
Once a month between April and July, apply a balanced granular fertilizer (5-10-5 or 5-10-10). Allow ¾ to 1 cup for each bush, and sprinkle it around the drip line, not against the stem. See our fertilizer guide for more information.
In May and June, scratch in an additional tablespoon of Epsom salts along with your fertilizer; the magnesium sulfate will encourage new growth from the bottom of the bush.
Pruning Roses
Prune roses every spring and destroy all old or diseased plant material. Wear elbow-length gloves that are thick enough to protect your hands from thorns or a clumsy slip, but flexible enough to allow you to hold your tools. Always wear safety goggles; branches can whip back when released.
Start with pruning shears for smaller growth. Use loppers, which look like giant, long-handle shears, for growth that is more than half an inch thick. A small pruning saw is handy, as it cuts on both the push and the pull.
Deadhead religiously and keep beds clean. Every leaf has a growth bud, so removing old flower blossoms encourages the plant to make more flowers instead of using the energy to make seeds. Clean away from around the base of the rosebushes any trimmed debris that can harbor disease and insects.
Late in the season, stop deadheading rugosas so that hips will form on the plants; these can be harvested and dried on screens, away from sunlight, then stored in an airtight container. Stop deadheading all your rose plants 3 to 4 weeks before the first hard frost so as not to encourage new growth at a time when new shoots may be damaged by the cold.
Winterizing Roses
Do not prune roses in the fall. Simply cut off any dead or diseased canes.
Stop fertilizing 6 weeks before the first frost but continue watering during dry autumn weather to help keep plants fortified during the dry winter.
Mound, mulch, or add compost after a few frosts but before the ground freezes. Where temperatures stay below freezing during winter, enclose the plant with a sturdy mesh cylinder, filling the enclosure with compost, mulch, dry wood chips, pine needles, or chopped leaves.
Don’t use heavy, wet, maple leaves for mulch. Mulch instead with oak leaves, pine needles, compost, or straw.
Clean up the rose beds to prevent overwintering of diseases. One last spray for fungus with a dormant spray is a good idea.
PESTS/DISEASES
Good gardening practices such as removing dead leaves and canes will help reduce pests. Find out which pests are most prevalent in your area by checking with your local nursery. Here are some of the more common problems:
Japanese Beetles
Aphids: To keep aphids away from roses, plant garlic and mint around the roses.
Black Spot: Rose plant leaves with black spots that eventually turn yellow have black spot, often caused by water splashing on leaves, especially in rainy weather. Leaves may require a protective fungicide coating, which would start in the summer before leaf spots started until first frost. Thoroughly clean up debris in the fall, and prune out all diseased canes.
Powdery Mildew: If leaves, buds, and stems are covered with a white powdery coating, this is a mildew disease; mildew develops rapidly during warm, humid weather. During new growth, prevent mildew by spraying or dusting canes and leaf surfaces with fungicide. Prevent mildew by pruning out all dead or diseased canes in the spring. Destroy all diseased parts during the growing season.
Botrytis Blight: If the rose’s flower buds droop, stay closed, or turn brown, it has this grey fungus. Prune off all infected blossoms and remove any dead material. Fungicide application may be necessary.
Spider Mites
Thrips
Rust
Stem Borers
Deer: Roses are a delectable tidbit, so try planting lavender near your roses. Not only will you have the makings of a nice potpourri, but the scent of lavender will discourage browsers. You can also spread human or dog hair around the garden area or check our list of deer-resistant plants to protect your roses.
In general, avoid rose issues by buying disease-resistant varieties and cleaning up debris, weeds, fallen leaves and any diseased plant material as soon as possible.
PLANT TYPE: Flower
SOIL TYPE: Loamy
BLOOM TIME: SpringSummerFall
Rose bushes come in a variety of forms, from climbing roses to miniature rose plants, blooming mainly in early summer and fall.. One way to group roses into classes is according to their date of introduction:
Old roses—also called “old-fashioned roses” and “heirloom roses”—are those introduced prior to 1867. These are the lush, invariably fragrant roses found in old masters’ paintings. There are hundreds of old rose varieties—whose hardiness varies—providing choices for both warm and mild climates.
Modern hybrid roses are sturdy, long-blooming, extremely hardy and disease-resistant, and bred for color, shape, size, and fragrance.
Species, or wild, are those that have been growing wild for many thousands of years. These wild roses have been adapted to modern gardens and usually bloom in the spring.

PLANTING
Preparing the Soil
Roses prefer a near-neutral pH range of 5.5–7.0. A pH of 6.5 is just about right for most home gardens (slightly acidic to neutral).
An accurate soil test will tell you where your pH currently stands. Acidic (sour) soil is counteracted by applying finely ground limestone, and alkaline (sweet) soil is treated with ground sulfur.
Before you plant, be sure that you choose varieties proven in your climate. When in doubt, All-America Rose Selections winners are good bets. Or check with your local nursery.
Ordering Plants
If you order roses from a mail-order company, order early, in January or February (March at the latest). They are usually shipped in the spring as bare roots when plants are fully dormant, well before they have leafed out. They’ll look like a bundle of sticks on arrival. Note that they are not dead—simply dormant.
If you are buying container-grown roses (vs. bare-root roses), plant them by May or early June for best results.
Planting Tips
Plant roses where they will receive a minimum of 5 to 6 hours of full sun per day. Roses grown in weak sun may not die at once, but they weaken gradually. Give them plenty of organic matter when planting and don’t crowd them.
Wear sturdy gloves to protect your hands from prickly thorns. Have a hose or bucket of water and all your planting tools nearby. Keep your bare-root rose in water until you are ready to place it in the ground.
Roses can be cut back and moved in either spring or fall, but not in midsummer, as they might suffer and die in the heat. Large rose canes can be cut back by as much as two thirds, and smaller ones to within 6 to 12 inches of the ground.
When you transplant your roses, be sure to dig a much bigger hole than you think you need (for most types, the planting hole should be about 15 to 18 inches wide) and add plenty of organic matter such as compost or aged manure.
Some old-timers recommend placing a 4-inch square of gypsum wallboard and a 16-penny nail in the hole to provide calcium and iron, both appreciated by roses.

CARE
Watering Roses
Diligently water your roses. Soak the entire root zone at least twice a week in dry summer weather. Avoid frequent shallow sprinklings, which won’t reach the deeper roots and may encourage fungus. Roses do best with 90 inches of rain per year, so unless you live in a rain forest, water regularly.
Roses love water—but don’t drown them. That is, they don’t like to sit in water, and they’ll die if the soil is too wet in winter. The ideal soil is rich and loose, with good drainage. One of the worst mistakes you can make is to not provide adequate drainage.
Use mulch. To help conserve water, reduce stress, and encourage healthy growth, apply a 2- to 4-inch layer of chopped and shredded leaves, grass clippings, or shredded bark around the base of your roses. Allow about an inch of space between the mulch and the base stem of the plant.
Feeding Roses
Feed roses on a regular basis before and throughout the blooming cycle (avoid chemical fertilizers and pesticides if you’re harvesting for the kitchen).
Once a month between April and July, apply a balanced granular fertilizer (5-10-5 or 5-10-10). Allow ¾ to 1 cup for each bush, and sprinkle it around the drip line, not against the stem. See our fertilizer guide for more information.
In May and June, scratch in an additional tablespoon of Epsom salts along with your fertilizer; the magnesium sulfate will encourage new growth from the bottom of the bush.
Pruning Roses
Prune roses every spring and destroy all old or diseased plant material. Wear elbow-length gloves that are thick enough to protect your hands from thorns or a clumsy slip, but flexible enough to allow you to hold your tools. Always wear safety goggles; branches can whip back when released.
Start with pruning shears for smaller growth. Use loppers, which look like giant, long-handle shears, for growth that is more than half an inch thick. A small pruning saw is handy, as it cuts on both the push and the pull.
Deadhead religiously and keep beds clean. Every leaf has a growth bud, so removing old flower blossoms encourages the plant to make more flowers instead of using the energy to make seeds. Clean away from around the base of the rosebushes any trimmed debris that can harbor disease and insects.
Late in the season, stop deadheading rugosas so that hips will form on the plants; these can be harvested and dried on screens, away from sunlight, then stored in an airtight container. Stop deadheading all your rose plants 3 to 4 weeks before the first hard frost so as not to encourage new growth at a time when new shoots may be damaged by the cold.
Winterizing Roses
Do not prune roses in the fall. Simply cut off any dead or diseased canes.
Stop fertilizing 6 weeks before the first frost but continue watering during dry autumn weather to help keep plants fortified during the dry winter.
Mound, mulch, or add compost after a few frosts but before the ground freezes. Where temperatures stay below freezing during winter, enclose the plant with a sturdy mesh cylinder, filling the enclosure with compost, mulch, dry wood chips, pine needles, or chopped leaves.
Don’t use heavy, wet, maple leaves for mulch. Mulch instead with oak leaves, pine needles, compost, or straw.
Clean up the rose beds to prevent overwintering of diseases. One last spray for fungus with a dormant spray is a good idea.

PESTS/DISEASES
Good gardening practices such as removing dead leaves and canes will help reduce pests. Find out which pests are most prevalent in your area by checking with your local nursery. Here are some of the more common problems:
Japanese Beetles
Aphids: To keep aphids away from roses, plant garlic and mint around the roses.
Black Spot: Rose plant leaves with black spots that eventually turn yellow have black spot, often caused by water splashing on leaves, especially in rainy weather. Leaves may require a protective fungicide coating, which would start in the summer before leaf spots started until first frost. Thoroughly clean up debris in the fall, and prune out all diseased canes.
Powdery Mildew: If leaves, buds, and stems are covered with a white powdery coating, this is a mildew disease; mildew develops rapidly during warm, humid weather. During new growth, prevent mildew by spraying or dusting canes and leaf surfaces with fungicide. Prevent mildew by pruning out all dead or diseased canes in the spring. Destroy all diseased parts during the growing season.
Botrytis Blight: If the rose’s flower buds droop, stay closed, or turn brown, it has this grey fungus. Prune off all infected blossoms and remove any dead material. Fungicide application may be necessary.
Spider Mites
Thrips
Rust
Stem Borers
Deer: Roses are a delectable tidbit, so try planting lavender near your roses. Not only will you have the makings of a nice potpourri, but the scent of lavender will discourage browsers. You can also spread human or dog hair around the garden area or check our list of deer-resistant plants to protect your roses.
In general, avoid rose issues by buying disease-resistant varieties and cleaning up debris, weeds, fallen leaves and any diseased plant material as soon as possible.
0
0
文章
Gina
2017年05月22日

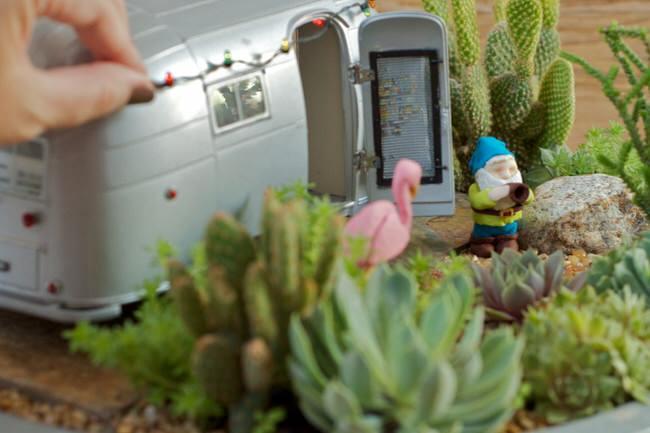
I have to admit, I’ve become a sucker for those miniature garden worlds called fairy gardens. The ability to create a scene or a memory in a garden that can be viewed close up, in detail… it’s a little bit fantasy, and part of the world of art. Both of which belong in a garden! They make it easy to be creative, even if your space is limited. (Or too large, for that matter). They make great gifts when done in containers and can be brought indoors at least part of the year. And here’s the thing… fairy gardens don’t always necessarily have fairies in them… Sometimes called mini gardens, they are “fairy sized”… Populating them with actual fairies is entirely a matter of taste! If you think you’ve seen it all at your local nursery though, we bet we can surprise you with at least one of these unique and creative fairy gardens. These are sure to inspire you, and some DIY tutorials are here to boot. Our feature photos above and below, are from ‘Lush Little Landscapes‘. This should be your first stop if you want to learn about making really unique fairy, or miniature gardens. They have some how-to information, some project guides and lots of info on where to find supplies. Most important, as these photos attest… they are inspiring!

Make a hobbit house with bonsai! ‘Bonsai Empire’ takes you through this project step by step… If you are a “Lord of the Rings’ fan, what a story to tell in your garden.

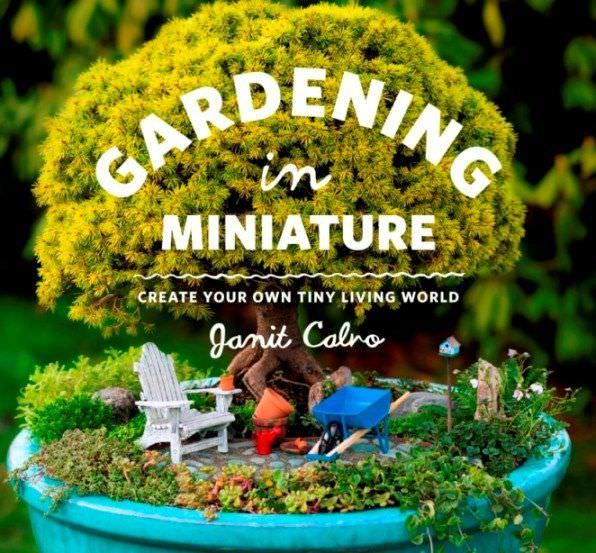
I’d like to introduce you to Janet Calvo… She is the author of “Gardening In Miniature“, a book which I own and highly recommend if you are interested in getting into this craft. She also has a great blog, at her website ‘Two Green Thumbs‘. AND a mini gardening shop online with all kinds of unique pieces you won’t find other places. Oh, and I love that she is based in Seattle, my favorite place on earth… Wonder if she would fancy a visit? Janet? :) The next two photos are from her, and they are truly inspiring! Really, get her book! I got it in Kindle, and it’s just amazing.
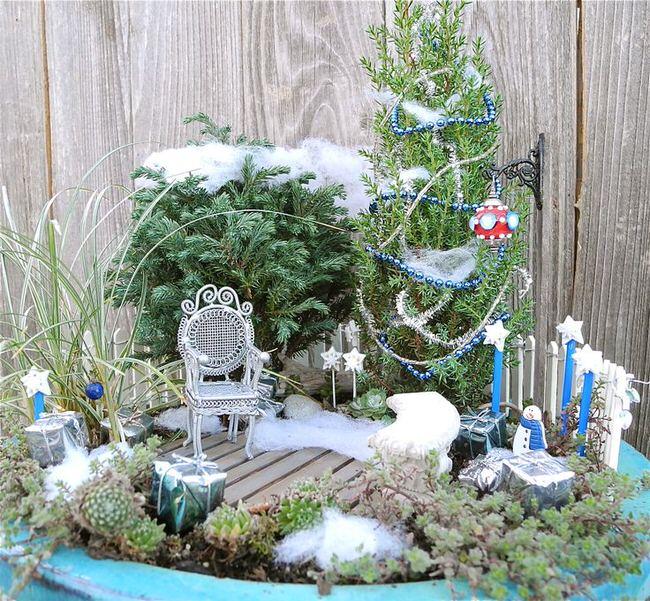
Janet teaches you how to use snow in your fairy garden!
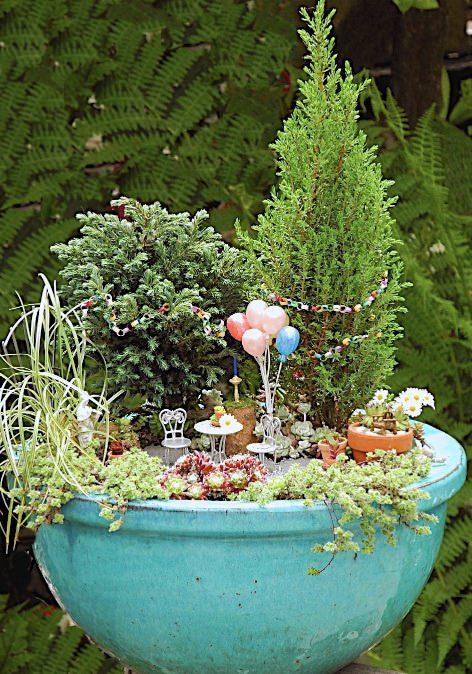
Also from Janet… Love the balloons!
Inspirational miniature garden ideas by ‘Melissa Mercier‘…

Another inspirational photo, from ‘Florence Griswold Museum‘, this Emerald City fairy house is truly unique!

Last, we have a couple of fairy gardens made from those old tree stumps you don’t know what to do with! This first one from an artist at the ‘Sequin Market‘.

This next one is very cute! From ‘The Owner Builder Network‘.

Finally, from Wendy on ‘Hometalk‘… This stump fairy garden is perfect, and can weather and age with time!

2
1


